UniSA Research Data Storage Features

This page showcases some of the key features of the UniSA Research Data Storage (NextCloud) platform that can help improve your research.

If you have any questions, please do not hesitate to email ISTS Research & Data Management Support.


How do I share files?

What are the different ways I can share files?

The UniSA Research Data Storage (NextCloud) platform allows you to share files in several ways:

  • You can directly give access to a file to someone who is also registered in the UniSA Research Data Storage platform 
  • You can share a file directly with an external person via email
  • You can distribute a share link to a file to multiple external people

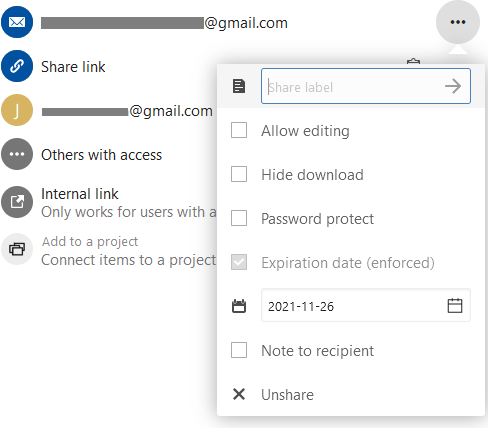
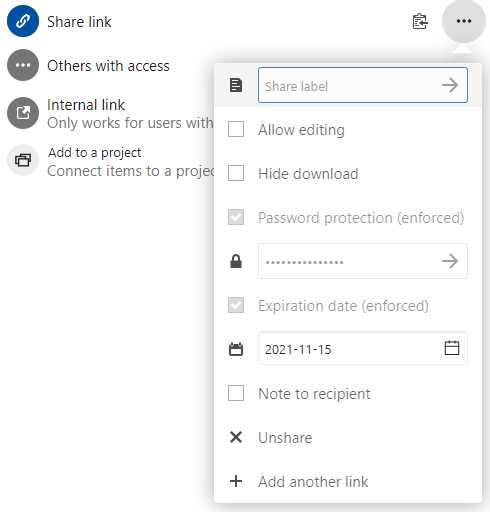
When you share a file, you have complete control over what access you are granting to the sharee.

Sharing options (registered user)


Sharing options (external user)


The same options are available whether you share files from the web, from your computer, or from your mobile device.

How do I share files from the web?

Sharing to an email address

  1. Browse to UniSA Research Data Storage and log in as normal.
  2. Locate the file or folder you wish to share, and click the share icon:.
  3. To share the file or folder with a specific person, start typing their email address in the "Name or email ..." field.
    1. If the person is already registered in the UniSA Research Data Storage platform, the system will suggest their full email address. Click on this email address to share the file or folder with them. The person will receive an email with a link to the file or folder.
      Sharing with a registered user
    2. If the person is not registered in the UniSA Research Data Storage platform, the system will display an email icon next to their email address. Click on the email address to share the file or folder with them. The person will receive two emails: one with a link to the file or folder, and one with a randomly-generated password that they will need to use to access the file or folder.
      Sharing with an external user

Sharing by link

  1. Alternatively, to share the file or folder with multiple people via a link, click on the "+" icon against the "Share link" option:Share link
  2. Select the desired expiration date, and click on "Create share":
    Create share
  3. Once the link has been created, click on the "Copy to clipboard" icon to copy the link: Copy share link
  4. You can also customise the access provided by the link, or even unshare the file or folder by clicking on the "..." icon against the "Share link" option:
    Share link options


How do I share files from my computer?

Sharing to an email address

  1. Open Windows Explorer and browse to your NextCloud folder:
    NextCloud folder
  2. Right-click on the file or folder you wish to share, and select the "Share options" option in the "Nextcloud >" menu:
    NextCloud share options
  3. To share the file or folder with a specific person, start typing their email address in the "Share with users or groups ..." field.
    1. If the person is already registered in the UniSA Research Data Storage platform, the system will suggest their full email address. Click on this email address to share the file or folder with them. The person will receive an email with a link to the file or folder.
      Sharing with a registered user
    2. If the person is not registered in the UniSA Research Data Storage platform, the system will display "(email)" after their email address. Click on the email address to share the file or folder with them. The person will receive two emails: one with a link to the file or folder, and one with a randomly-generated password that they will need to use to access the file or folder.
      Sharing with an external user

Sharing by link

  1. Alternatively, to share the file or folder with multiple people via a link, click on the "+" icon against the "Share link" option:Share link
  2. Enter a password for your link share, and click "OK":
    Link share password
  3. Once the link has been created, click on the "Copy to clipboard" icon to copy the link: Copy share link
  4. You can also customise the access provided by the link, or even unshare the file or folder by clicking on the "..." icon against the "Share link" option:
    Share link options

How do I share files from my mobile device?

Please note that iOS device functionality is slightly different but follows the same principles.

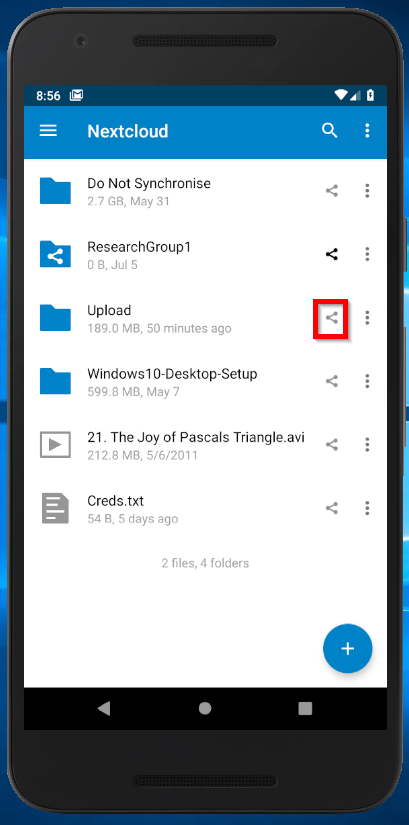
Open your mobile application and click the share icon:

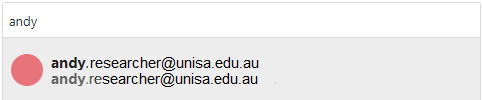
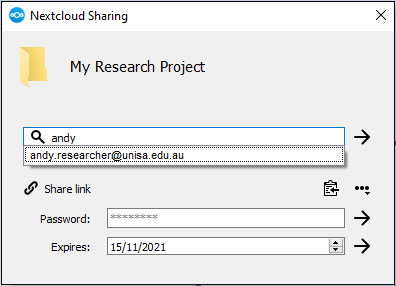
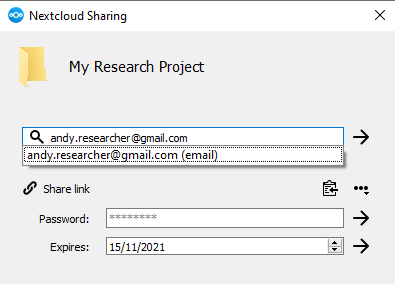
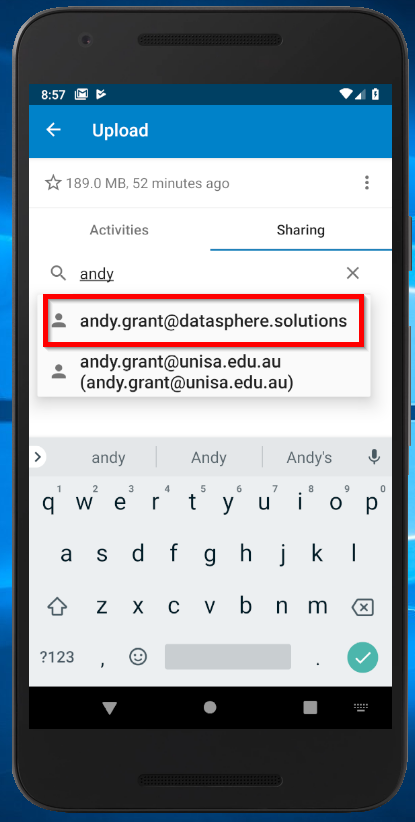
When prompted type in the known registered email address of a NextCloud account. It will attempt to autocomplete the address for you, select it. You can share with multiple recipients.

The sharing options are similar to the desktop client.

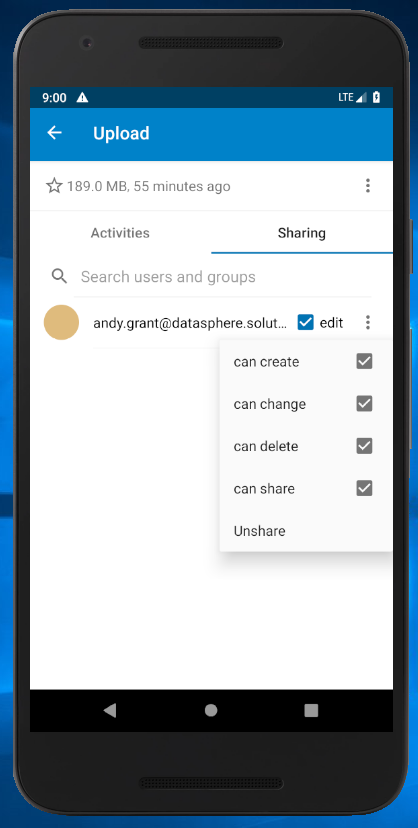
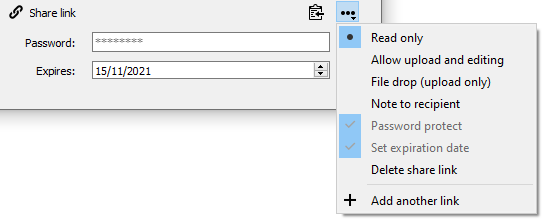
Unticking Edit will disable create change and delete permissions

If you do not want them to be able to re-share your folder with other people untick "Can Share".

With the mobile client you can configure auto uploads. This will automatically upload Media that you take with your phone. Choose Auto Upload from the menu.

How does the sharee access the shared file?

How does a registered user access the shared file?

When you share a file or folder with a user who is registered in the UniSA Research Data Storage platform, they will receive a single email containing a link to the file or folder:

Their browser will open and ask them to log in to the UniSA Research Data Storage platform as normal. They will then be able to access the file or folder.

How does an external user access the shared file?

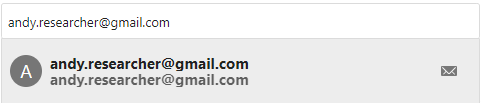
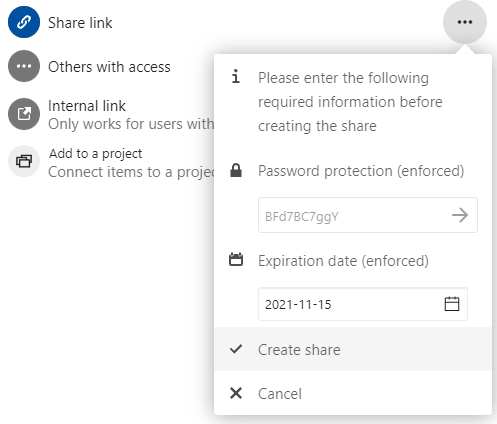
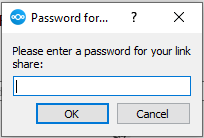
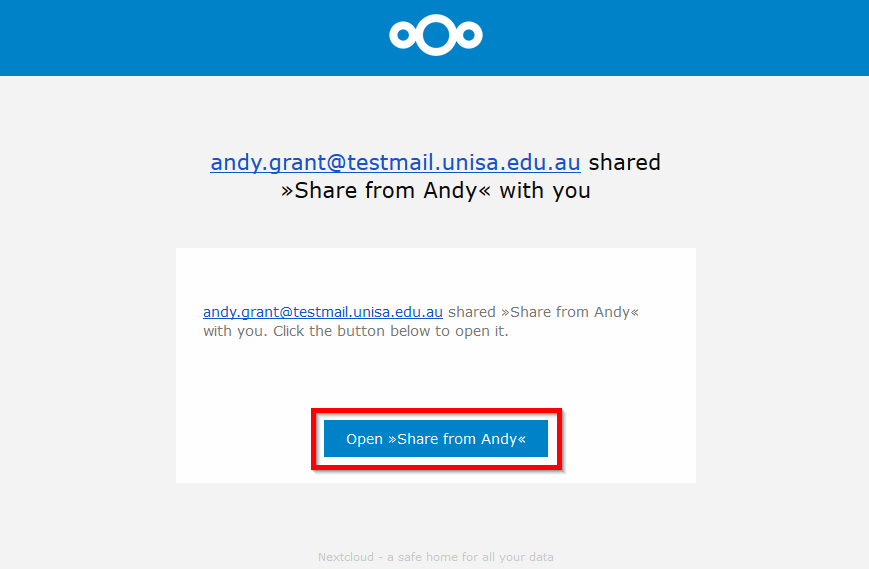
When you share a file or folder with a user who is not registered in the UniSA Research Data Storage platform, they will receive two emails:

They will need to copy the password from one email.

Then Click on the link in the other email.

Their browser will open and ask them for the password. They need to paste it in and press the arrow.

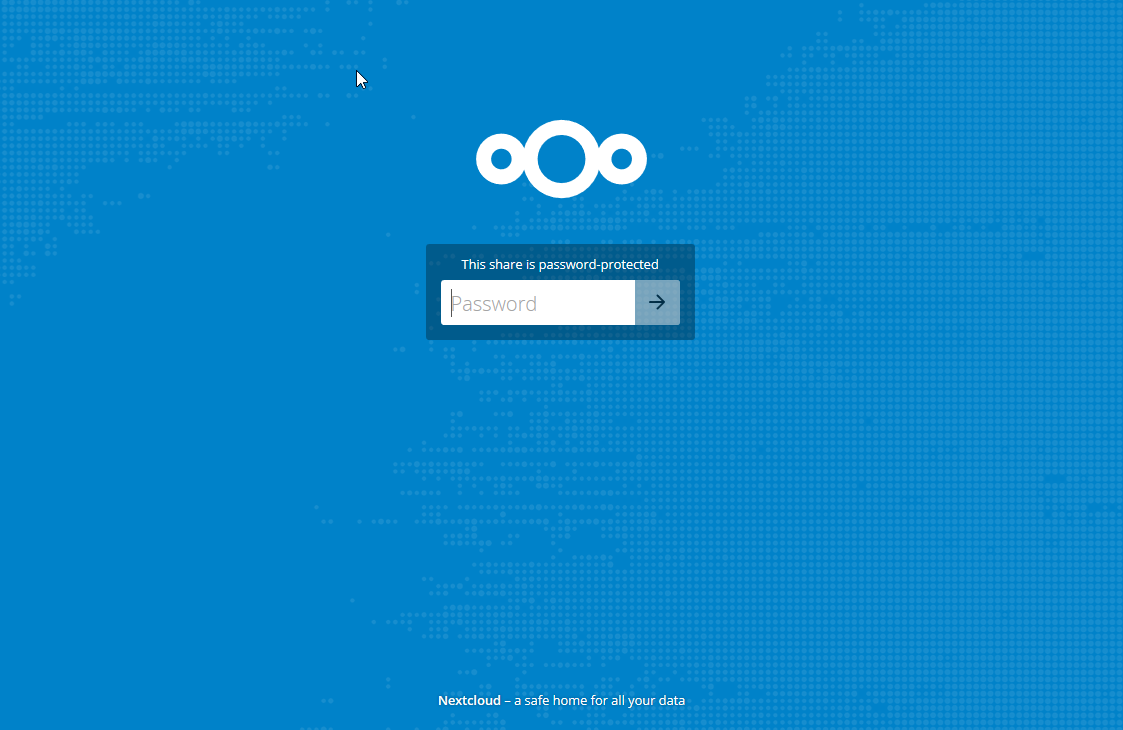
They will be then logged into the portal and have the access that you have given.

Please click here to return to the top of the page.

How do I upload a file?

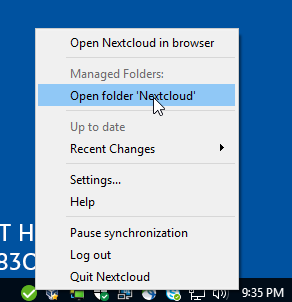
You can copy files up into Research Data Storage by copying them into your NextCloud Directory.

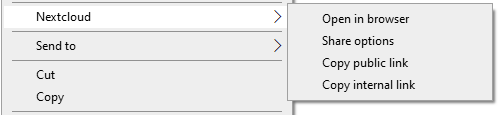
Right click on your NextCloud systray icon (Green Tick)

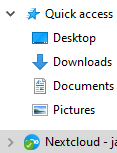
The directory is by default here:
C:\users\<yourusername>\Nextcloud

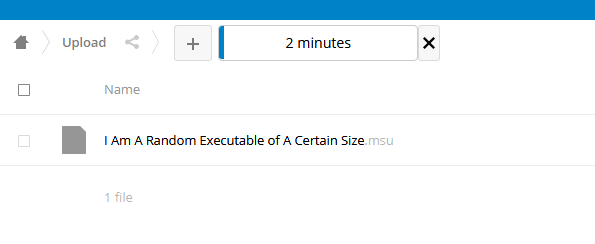
Once copied in there, those files will then synchronise to onsite Research Data Storage. You can see this happening with big files via a progress bar - by opening your NextCloud Client (double click on the green tick), a green progress bar will be displayed near the top.

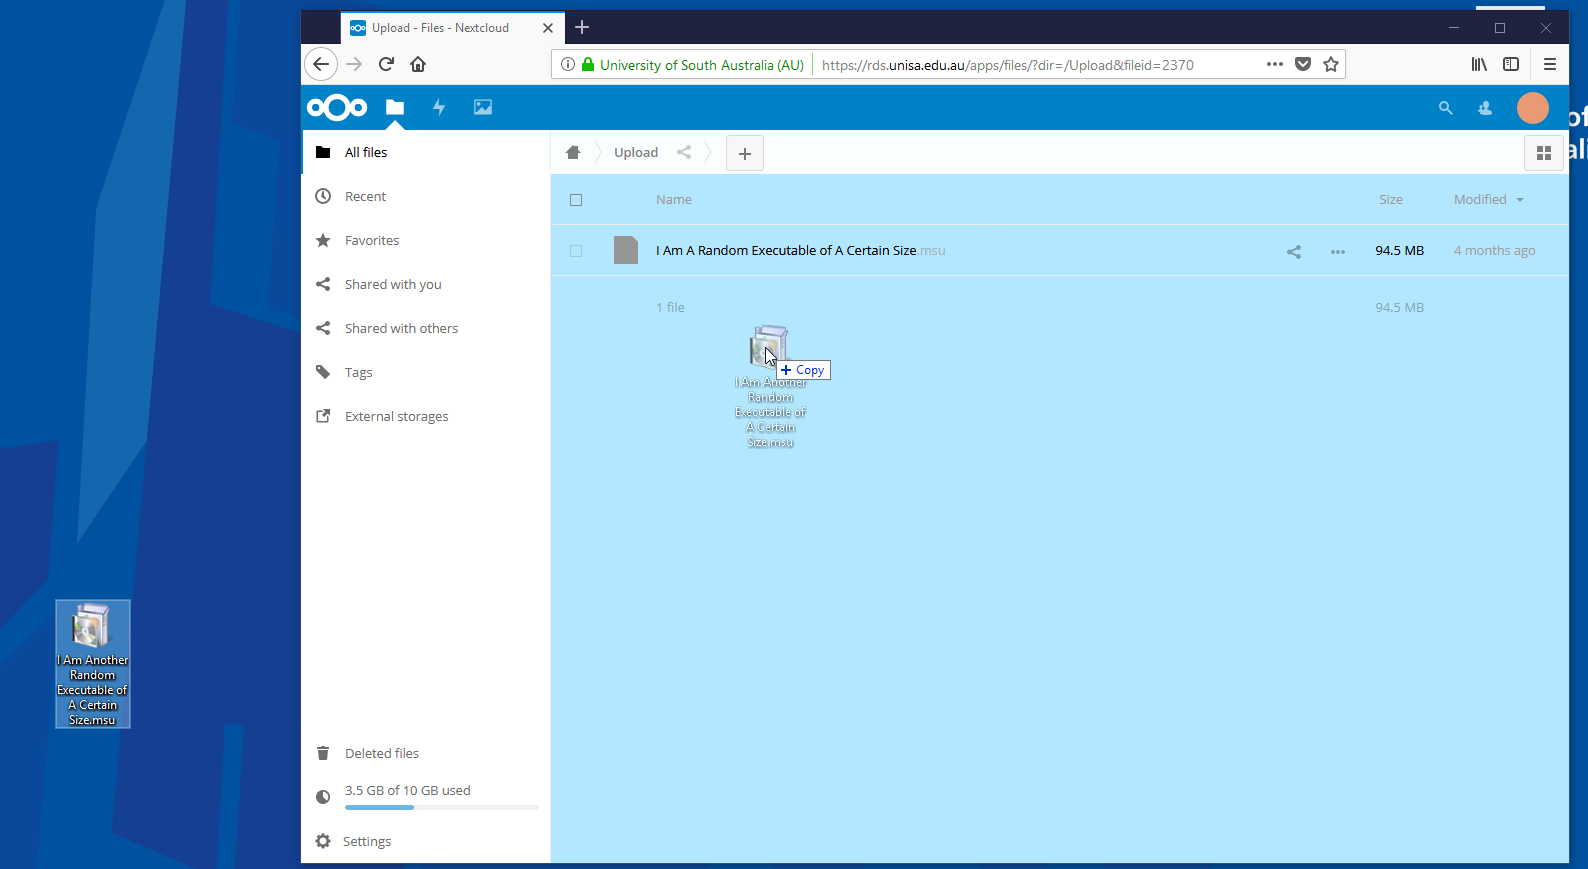
You can drag and drop files directly onto your browser when it is logged into the NextCloud application but there are limitations on the size of the file that you can upload this way.

You can see the progress bar of the upload detailed here:

You can also upload files from your mobile device by clicking on the + sign and choosing a file either from local storage or another application like Google Drive.

Please click here to return to the top of the page.

How do I undelete a file or folder?

To undelete a file, click deleted files, tick the folder or file you want to restore and click Restore.


The file or folder will then return to the original destination.

Please click here to return to the top of the page.

How do I rollback to a previous version?

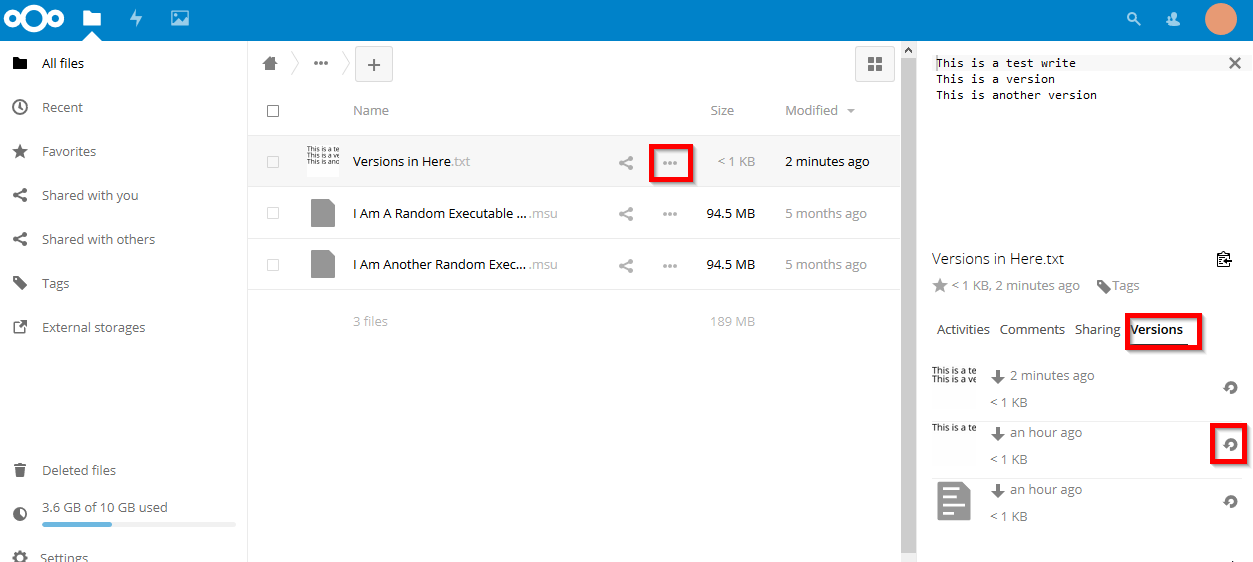
To rollback to a previous version of a file locate the changed file click the 3 dots and select version.

Choose the version you want to revert back to and click the restore button.


Versions are kept but expire automatically to make sure you don't run out of space. This is used to delete old versions:

  • For the first second we keep one version
  • For the first 10 seconds Nextcloud keeps one version every 2 seconds
  • For the first minute Nextcloud keeps one version every 10 seconds
  • For the first hour Nextcloud keeps one version every minute
  • For the first 24 hours Nextcloud keeps one version every hour
  • For the first 30 days Nextcloud keeps one version every day
  • After the first 30 days Nextcloud keeps one version every week

Note: Deleted items and versions never use more that 50% of your space. If the stored versions exceed this limit, Nextcloud deletes the oldest versions.

Please click here to return to the top of the page.

How do I resolve file conflicts?

The role of the NextCloud desktop client is to upload file changes you have made on your device to the central server, and to download file changes made by other users to these files to your device. This synchronisation process is performed at regular intervals.

However, if you and another user both change the same file (let us call it "datadictionary.docx") at the same time during synchronisation runs, NextCloud will be unable to merge your changes and the other user's changes automatically. Instead, the NextCloud desktop client will do the following:

  • Backup your changes to a copy of the file on your device, called "datadictionary (conflicted copy 2021-10-15 145001).docx"
  • Download the other user's changes to your local version of "datadictionary.docx"
  • Notify you in the desktop client that a conflict has occurred

To resolve the conflict, please follow these steps:

  1. Open both files
  2. Compare the differences and copy your local changes from the "conflicted copy" file into the base file
  3. Delete the "conflicted copy" file

The NextCloud desktop client will then synchronise your changes back to the central server.

For more information, see: NextCloud 2021, Conflicts, <https://docs.nextcloud.com/desktop/3.3/conflicts.html>.

Please click here to return to the top of the page.

How can I see who has access to my data?

  1. Browse to UniSA Research Data Storage and log in as normal.
  2. In the top-right of the screen, click on your profile icon, and select Settings.
    User settings
  3. On the left-hand side of the screen, under the Personal menu, click on Privacy.
    User Privacy
  4. The Privacy screen shows you who has access to your data, and where your data is stored. All data uploaded into the UniSA Research Data Australia platform is stored on our University data centres in South Australia.
    Data sovereignty

Please click here to return to the top of the page.

How can I add metadata to my folders?

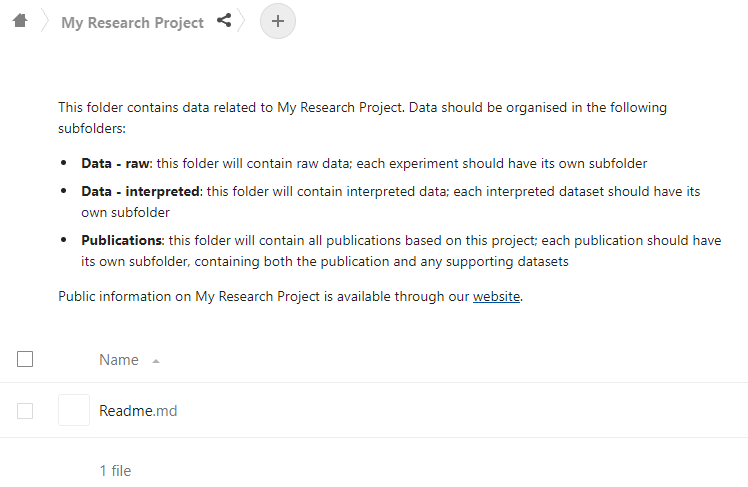
It can be very helpful to be able to annotate folders with contextual information about the type of data that should be stored there, or the way in which the data should be organised.

  1. To add contextual metadata to a folder, double-click on the "Add notes, lists or links ..." text below the name of the folder you are currently browsing:
    Add notes
  2. The system will automatically generate a Readme.md file that will contain this contextual metadata. The metadata will be stored in Markdown format, which supports various formatting options. Please see https://www.markdownguide.org/basic-syntax/ for more information on this format.
    Metadata readme.md
  3. You can edit the contextual metadata directly in the "Add notes, lists or links ..." section, or by editing the Readme.md file.
    Contextual metadata
    You can even include links to external websites or to files within the UniSA Research Data Storage platform (for example, you could link to your data dictionary).

Please click here to return to the top of the page.