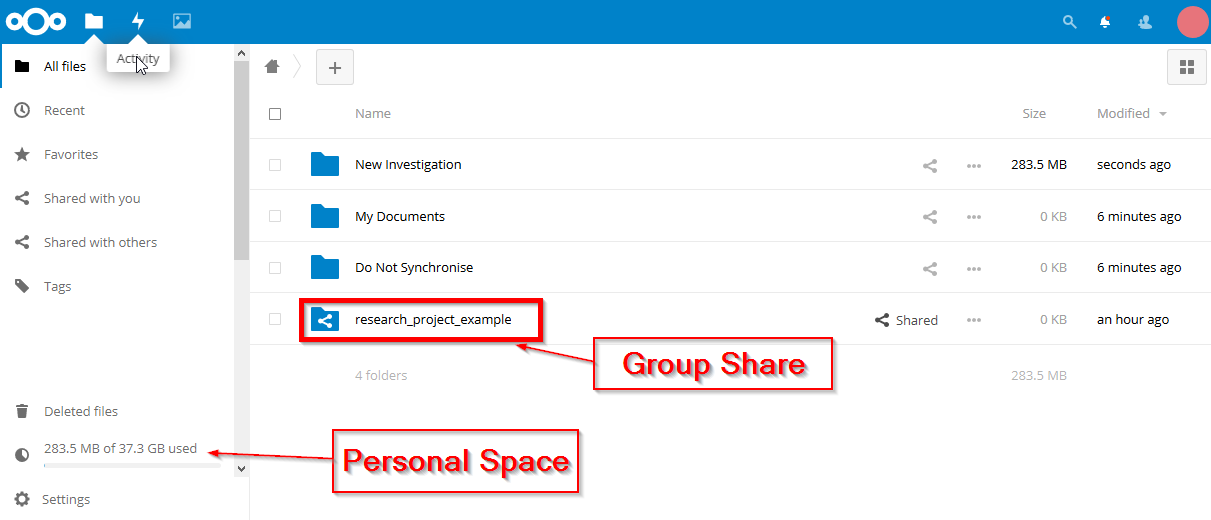
UniSA Research Data Storage using NextCloud allows researchers to store their data onsite and share data easily with external partners.
Please click the play button below to watch a short Introductory video.
Navigate to https://bpi.unisa.edu.au and login with your UniSA credentials.
When you request storage you will primarily receive 50 GB of space allocated to your personal profile.
Note: If you request further space in the Storage Requirements section, this space will be given to a Group Share that will show up as a folder in your personal profile. The Group Share will be given a name based on your research description or project and your ORG Unit. This will be decided by the approver that processes your request
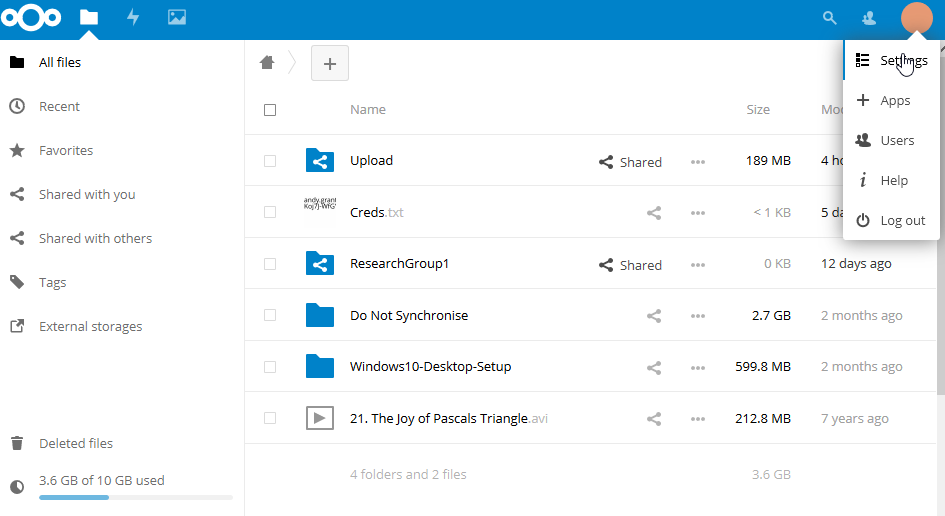
Below you can see an example of how it looks when you have logged into the NextCloud Website.
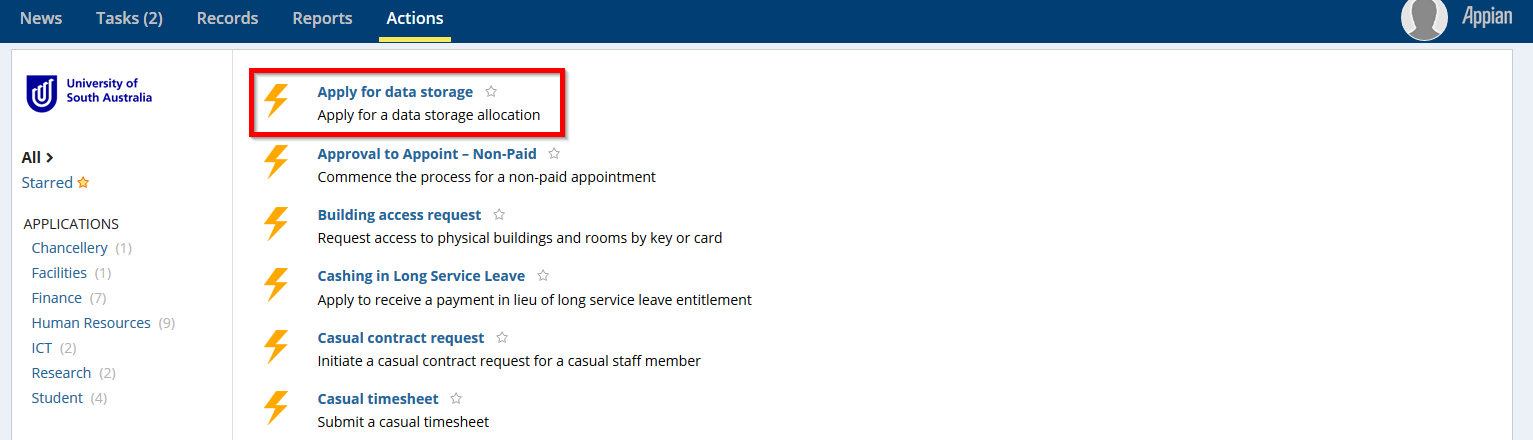
Click on Actions.

Click on Apply for data storage.
Click on Create a New Request.

Verify your authority by selecting the tickbox.
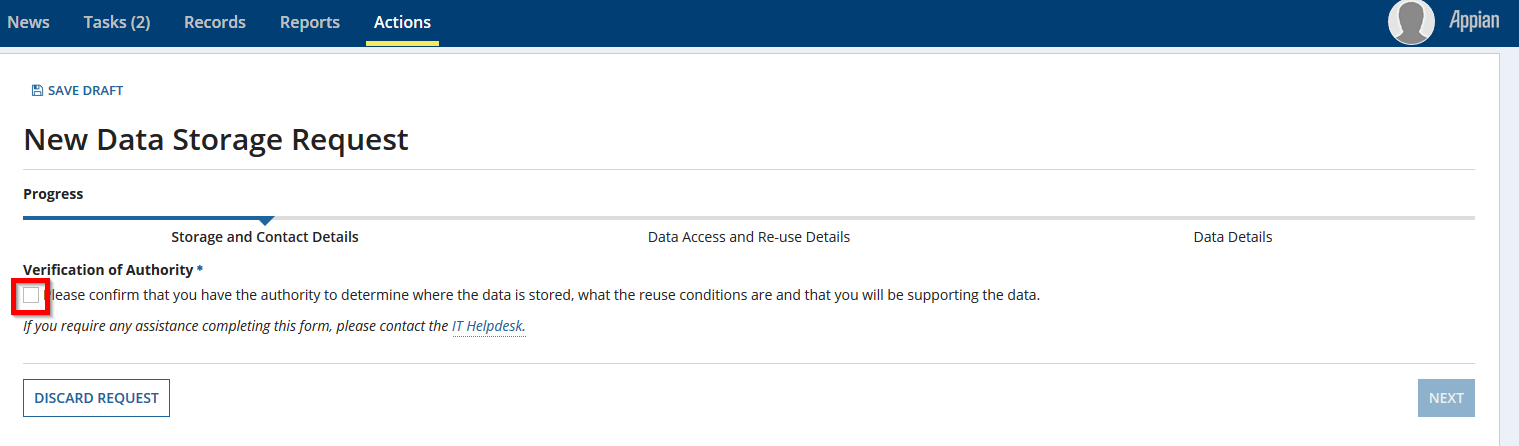
Once ticked, more fields will become available.
1. Fill in your Contact Number
2. The current space that you may have (if you do) and the space that you want to request (remember to choose the right units ie: gigabytes or terabytes)
3. Fill in where the current data is located (if it exists)
4. Tell us whether you need help moving old data into UniSA Research Data Storage
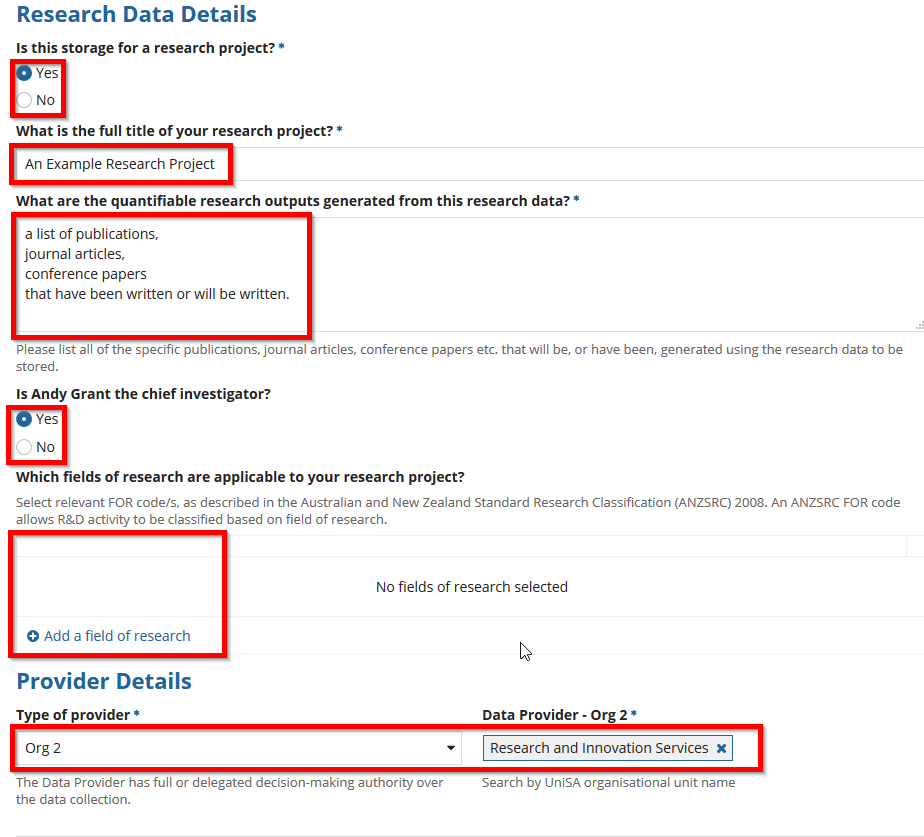
5. Importantly, Select YES to whether this storage is for research data.
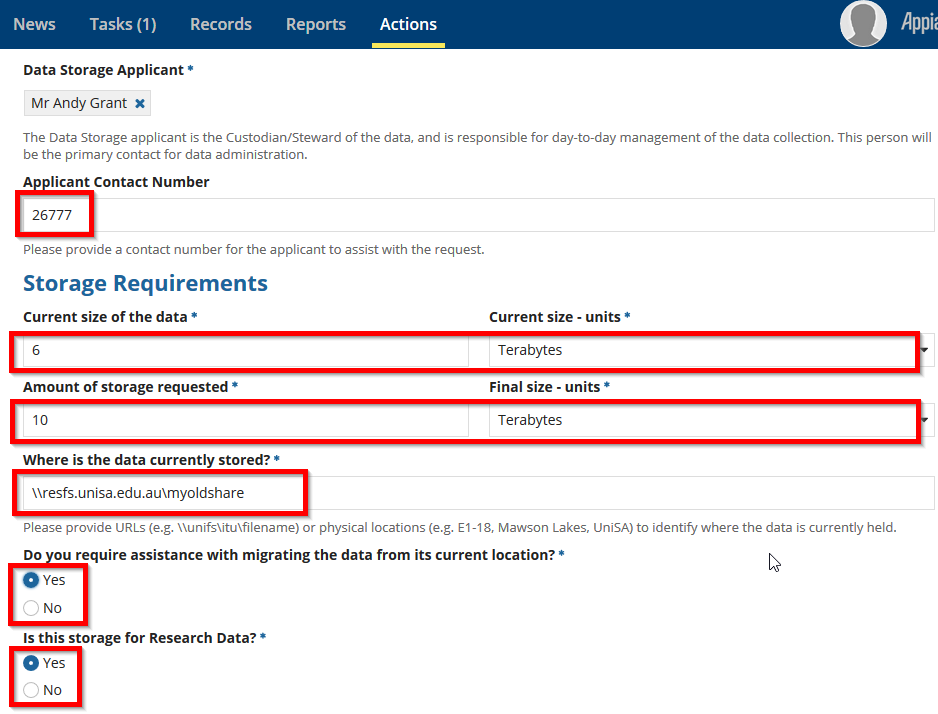
6. Select whether the storage is for a specific research project, and fill in the specifics.
7. Identify the ORG unit that has delegated decision making authority over the data collection.
Click Next when finished.
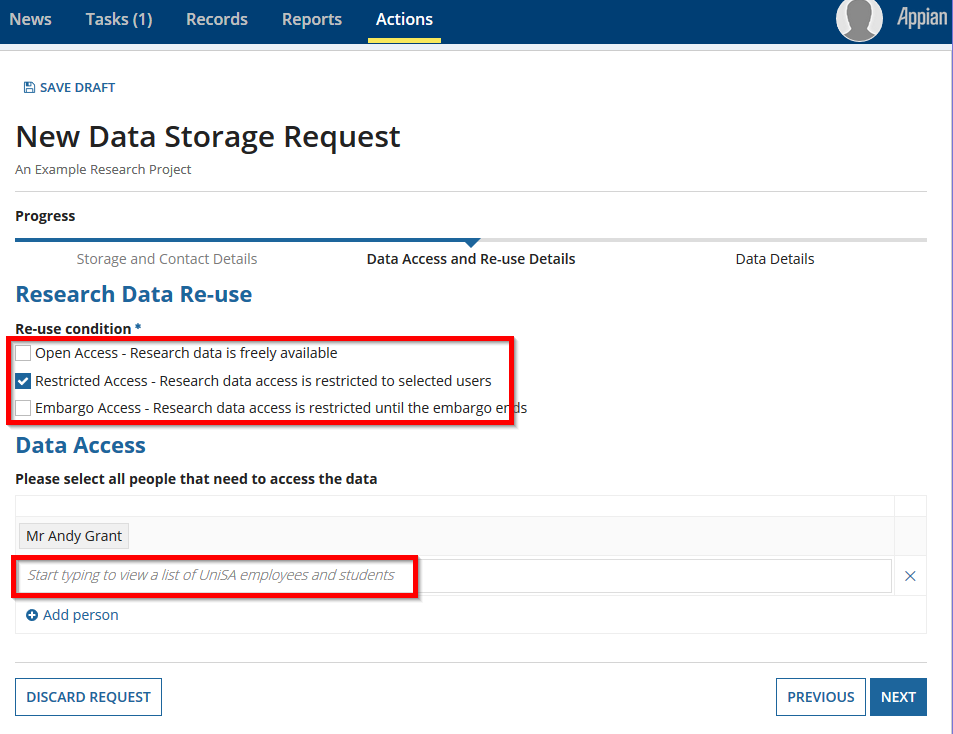
At the next screen select Restricted Access if you want to add other staff to your Group.
Underneath, type the list of staff that you want to be part of your Group, this will allow access to your Group Share. A Group should consist of the core staff members that require access to the group share.
Note: You can share access to the Group Share with other staff and students afterwards if required.
Click Next when ready.
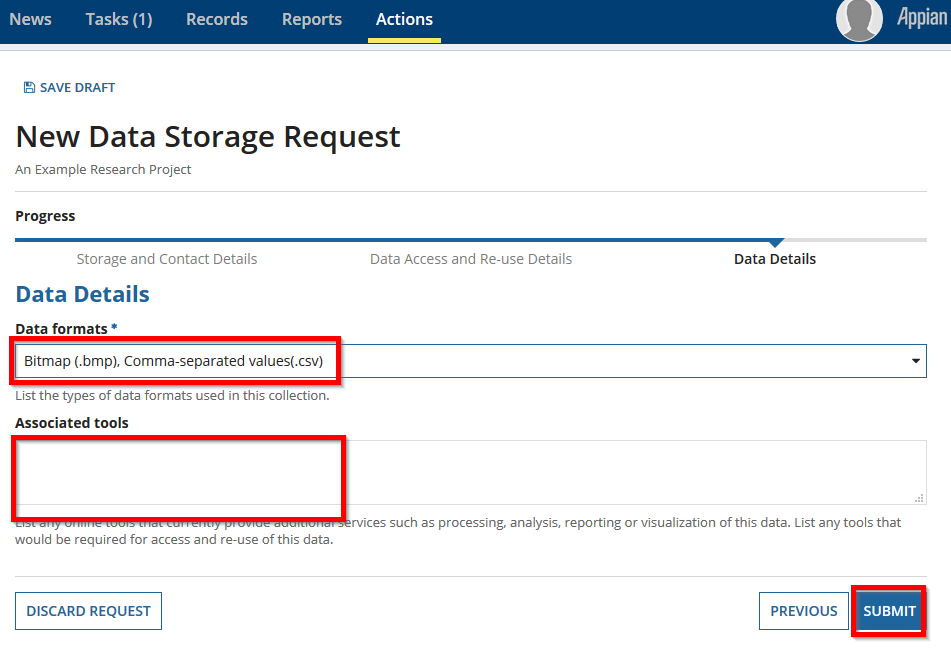
At the final screen, select the data formats that you could be storing and any associated tools that your dataset requires to access or re-use the data.
Click Submit.
Please click here to return to the top of the page.
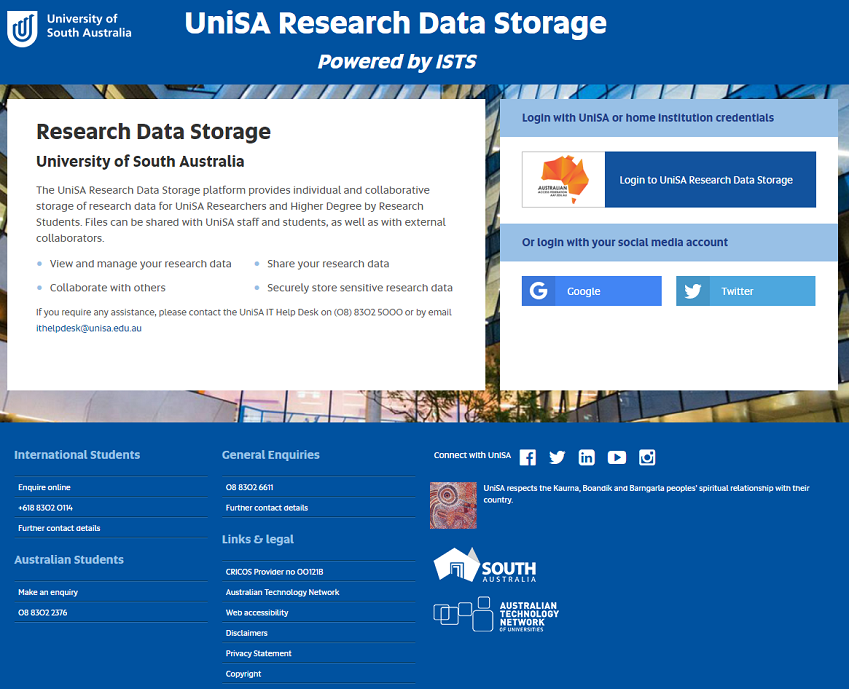
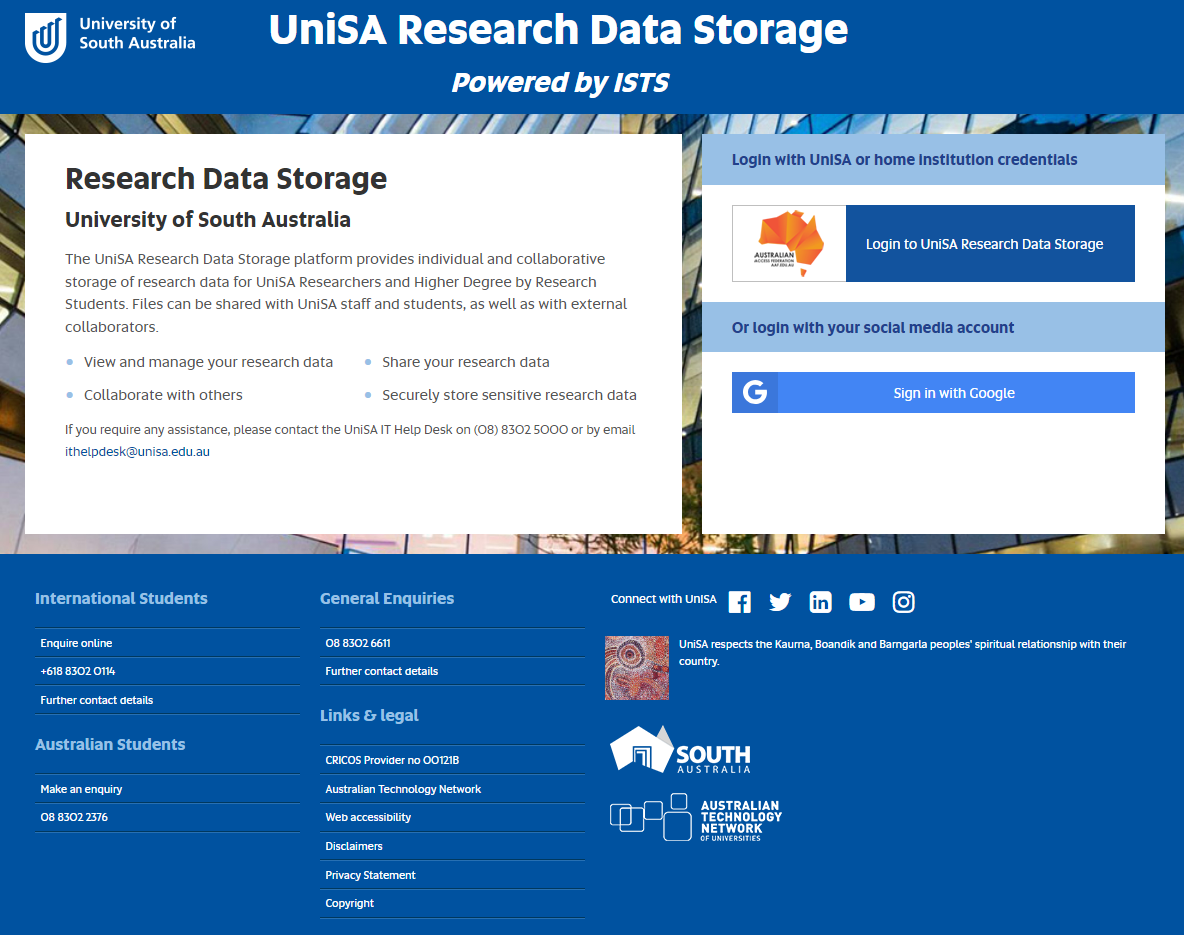
Using your browser, visit https://rds.unisa.edu.au
Click on Login to UniSA Research Data Storage as indicated below.

Please note: The next few screens, may or may not be presented, depending on whether you have previously logged in.
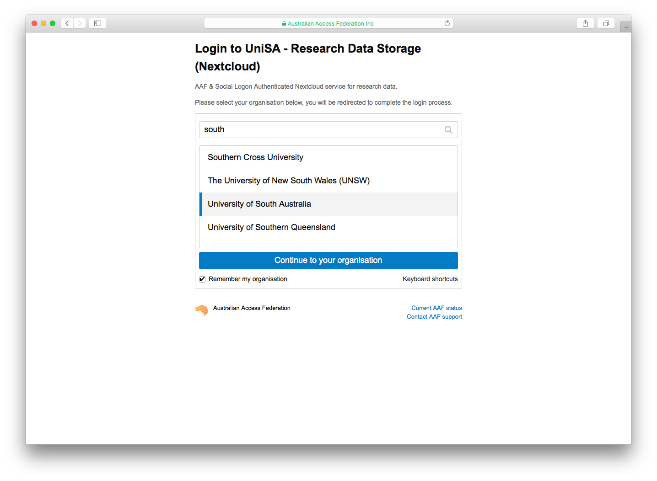
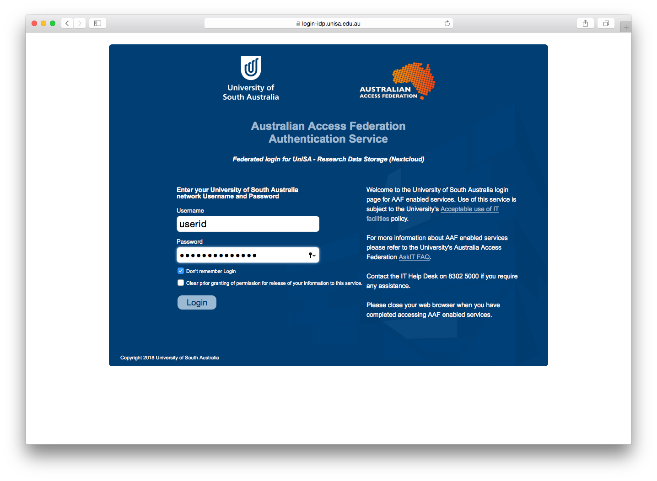
At the next screen you may be asked to specify which University you belong to.
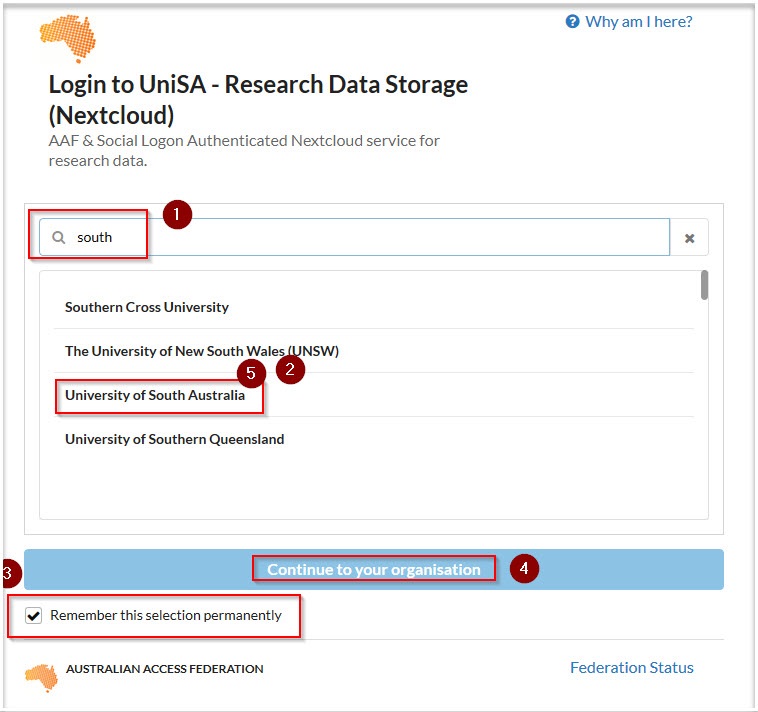
1. In the search bar type South
2. University of South Australia will be shortlisted, please select it
3. Tick Remember this selection permanently
4. Click Continue to your organisation
When prompted at the next screen
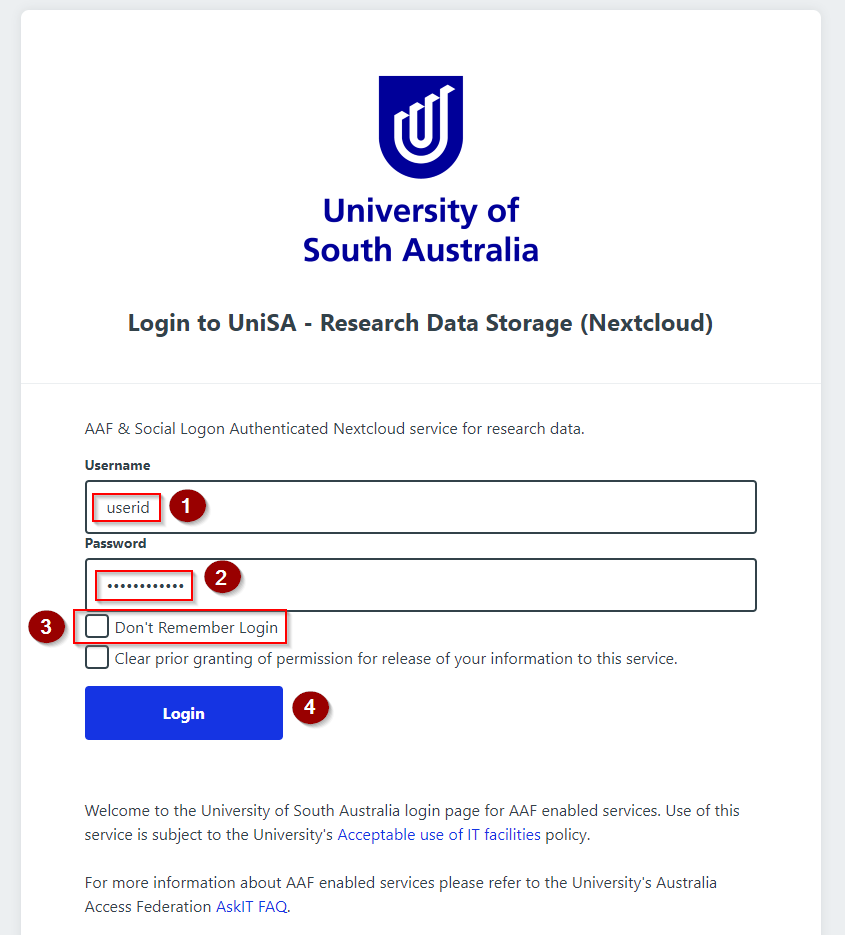
1. Enter your username
2. Type your password
3. Click don't remember login (if you are logging in from a public computer)
4. Click Login
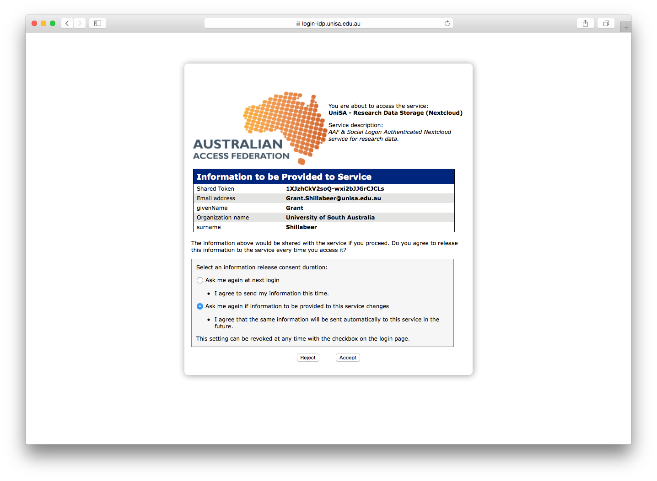
At the next screen if prompted

1. Select Ask me again if information to be provided to this service changes
2. Click Accept
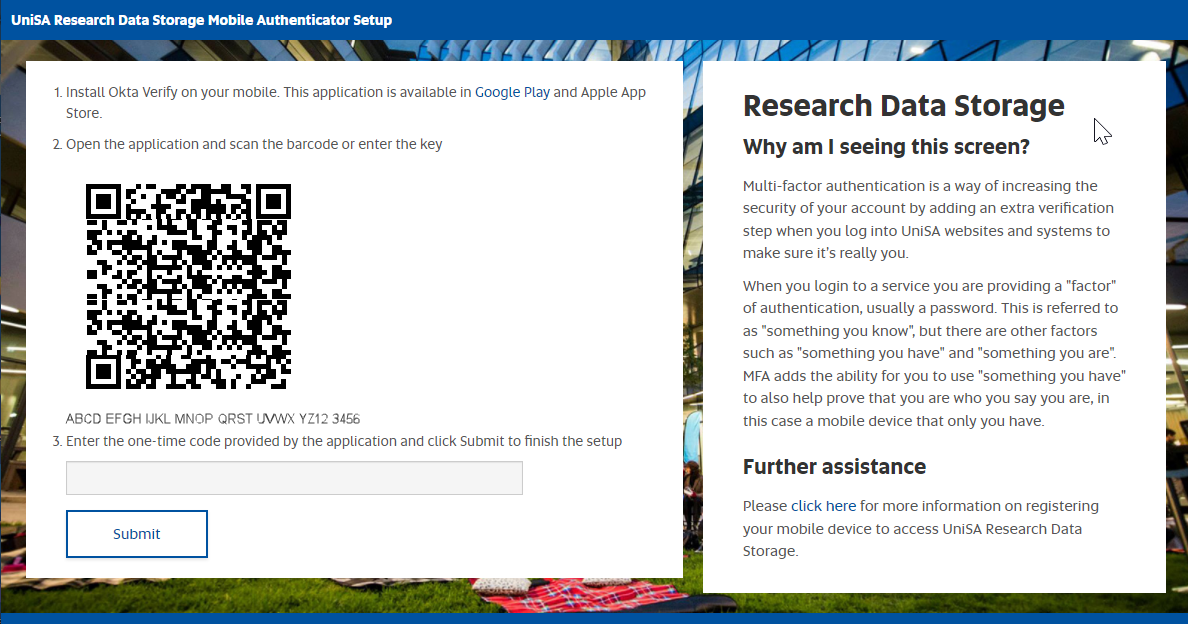
To ensure the security of the UniSA Research Data Storage platform, you will be prompted to use multi-factor authentication (MFA) to complete the login process.
If this is your first time accessing the system, the MFA setup screen will be displayed.
You will need to register a new QR code with the Okta Verify app. Please note this is not the same QR code as previous Okta MFA Registrations for other UniSA applications.
In the Okta Verify app you will need to choose 'Add account' and choose 'Other 2-factor authentication code for third party services'.
You can then choose to scan the QR code or enter the key shown manually.
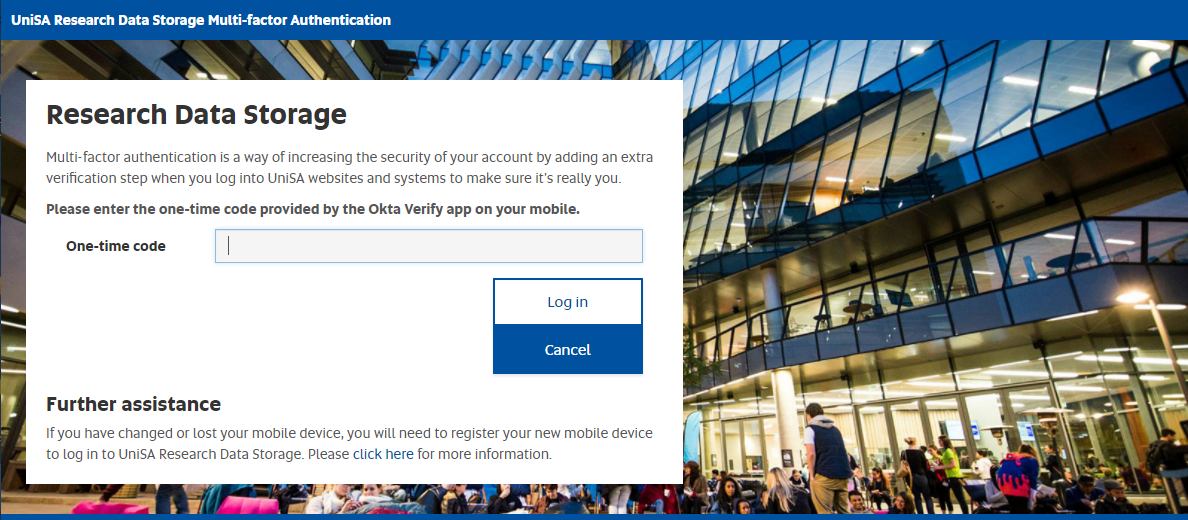
If you have already setup MFA on a previous login, the MFA login screen will be displayed. Follow the instructions on screen to complete the login process.
If you have lost your phone or have changed your phone without migrating your MFA codes you will need to contact the IT Help Desk and ask for your RDS MFA to be reset.
IT Help Desk (08) 8302 5000 or email ithelpdesk@unisa.edu.au.
Please click here to return to the top of the page.
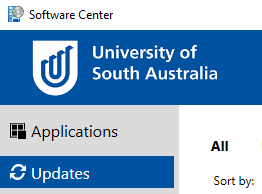
Please follow the instructions below to install the NextCloud Windows Desktop Client from the approved UniSA Software Center.
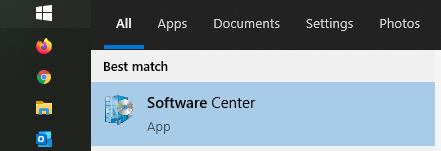
Click on the Windows Start menu, locate the Software Center, and click on it to launch it.
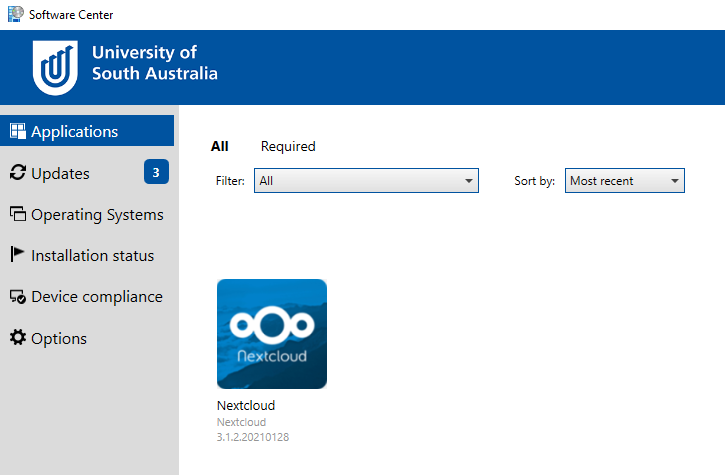
In the list of applications, click on Nextcloud.
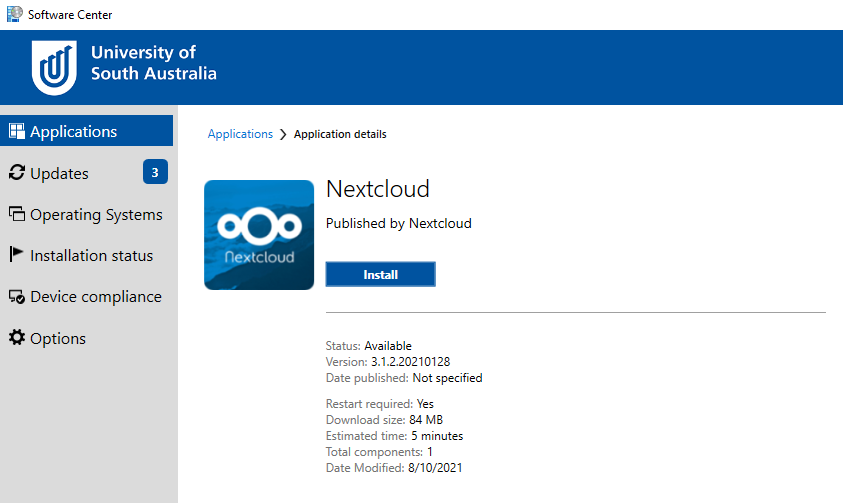
When prompted, click on Install.
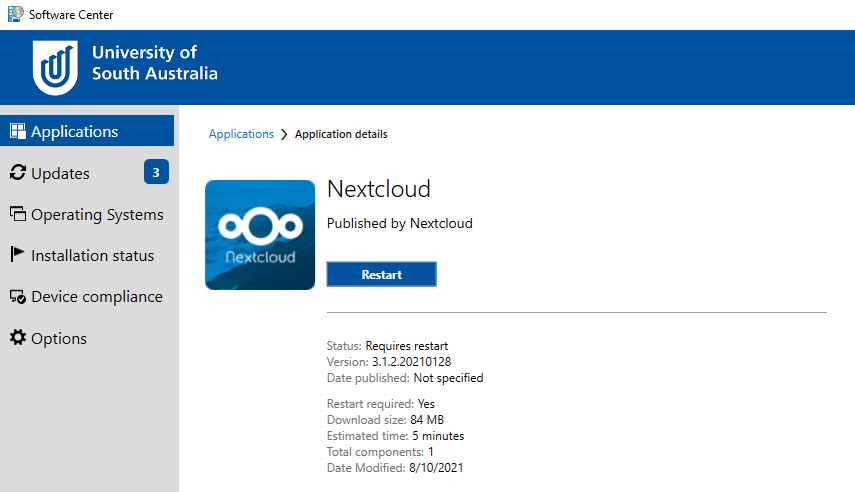
When the installation is complete, click the Restart button to restart your computer.
When your computer has finished restarting, locate the Nextcloud icon on your desktop and double click on it to launch the desktop client.
![]()
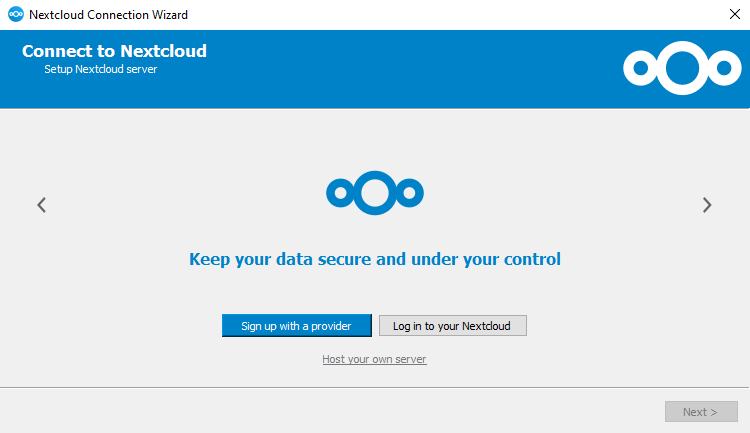
When the NextCloud client runs for the first time, you will be presented with the following screen. Click on Log in to your Nextcloud.
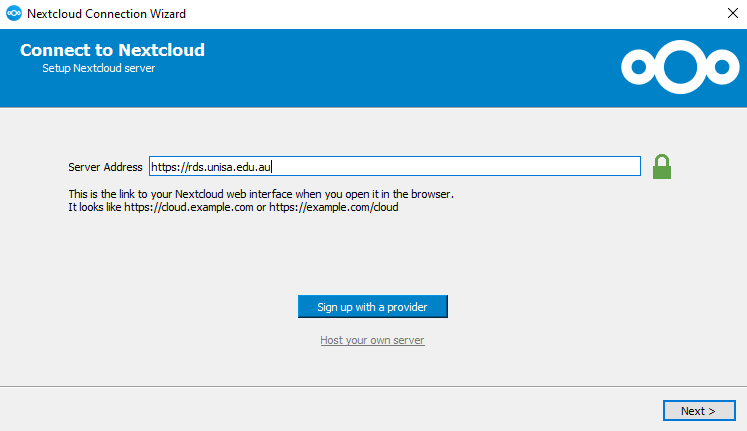
it will ask you for a server address. Type in https://rds.unisa.edu.au as below. Click Next >.
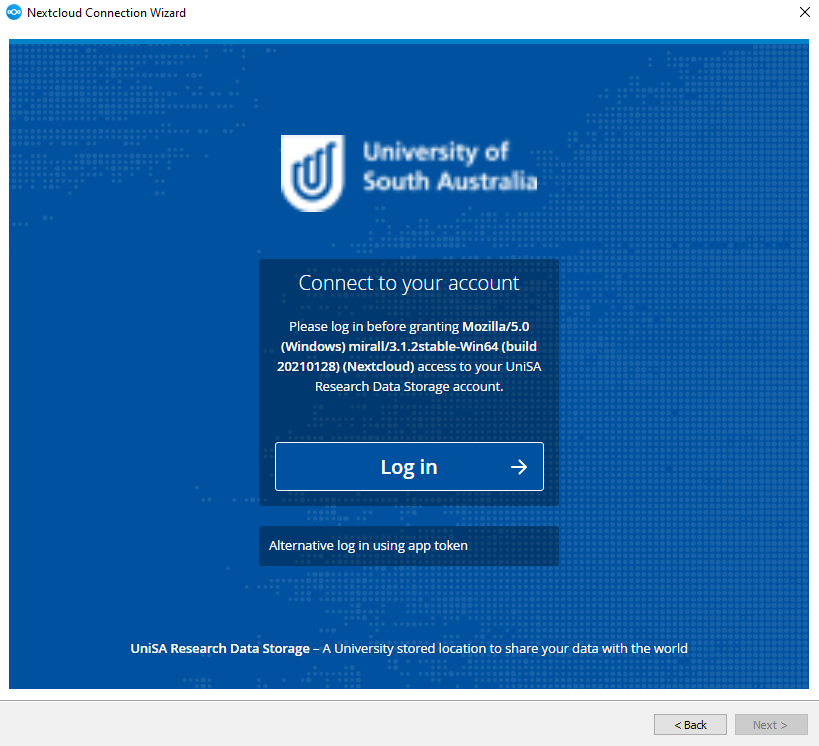
The NextCloud desktop client will now try to connect to your UniSA NextCloud account. Click on Log in.
Follow the on-screen instructions to log in to UniSA Research Data Storage (or see How do I log in to the Webpage for more details).
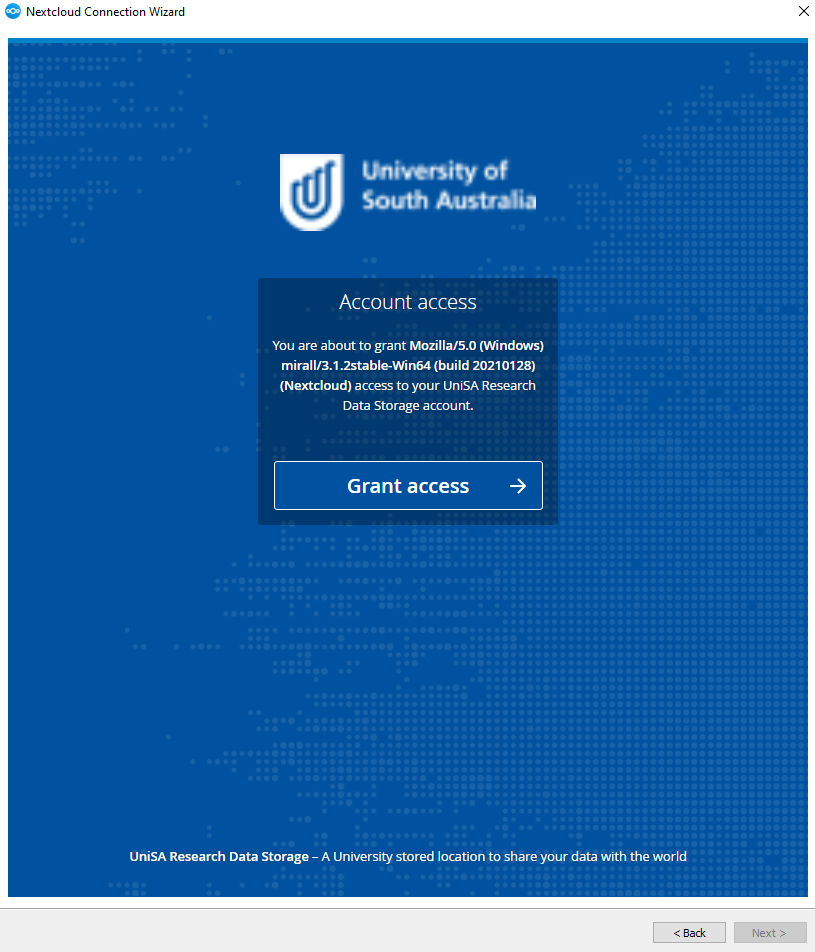
Once you have logged in, the NextCloud Desktop Client will ask you to grant it access to your NextCloud account. Click on Grant access.
The final step is to configure what files will be synchronised to your computer. If you are happy with the default settings, click Connect ....
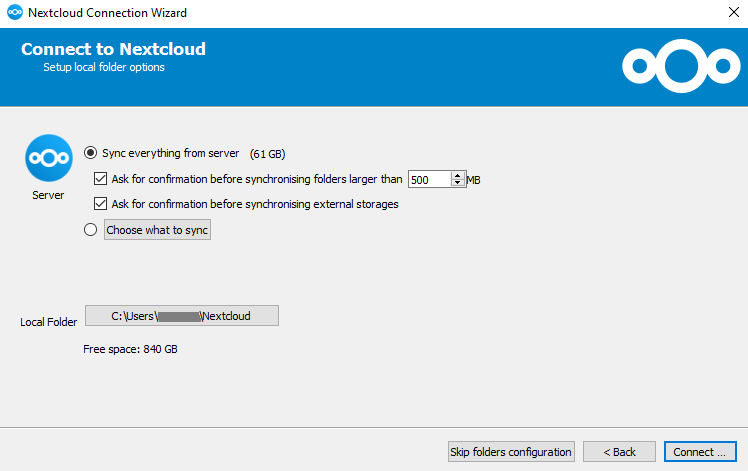
The NextCloud Desktop Client is now set up.
You can view the local copy of your files in your Nextcloud folder:
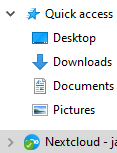
You can copy files to and from this folder and they will be synchronised up to UniSA's onsite storage. You will also see changes that other users make to these files if they have been shared.
Please click here to return to the top of the page.
To setup your Apple Mac for the first time, please see the following instructions.
Using your browser, visit https://rds.unisa.edu.au
Click on Login to UniSA Research Data Storage .
The next few screens, may or may not be presented, depending on whether you have previously logged in.
At the next screen you may be asked to specify which University you belong to.
1. In the search bar type South
2. University of South Australia will be shortlisted, please select it.
3. Tick Remember this selection permanently
4. Click Continue to your organisation
1. Enter your username
2. Type your password
3. Click don't remember login (if you are logging in from a public computer)
4. Click login
1. Select Ask me again if information to be provided to this service changes
2. Click Accept
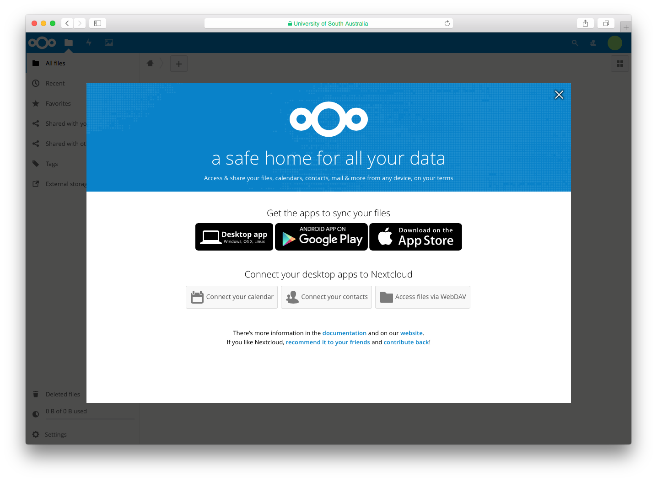
If this is the first time you have logged into Research Data Storage you will be presented with the following screen, click on Desktop App
If this is not the first time you have logged in, click your profile badge (top right hand corner), then click Settings.

On the left select Sync clients and then click on Desktop App.
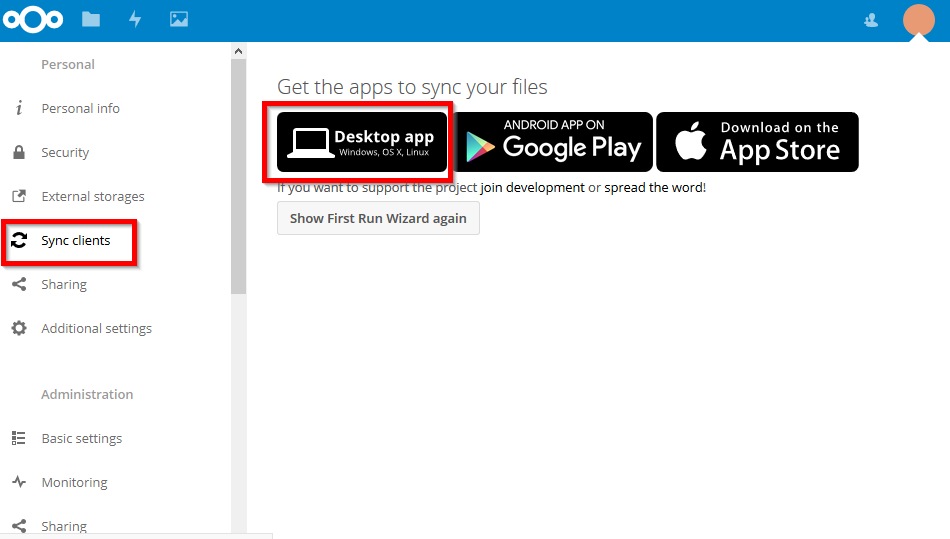
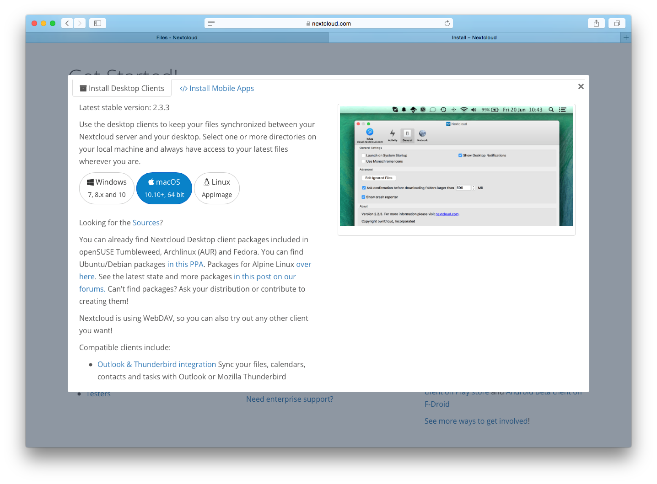
You will be redirected to the NextCloud website where you can download the latest version of the installer for your Mac.
Click MacOS.
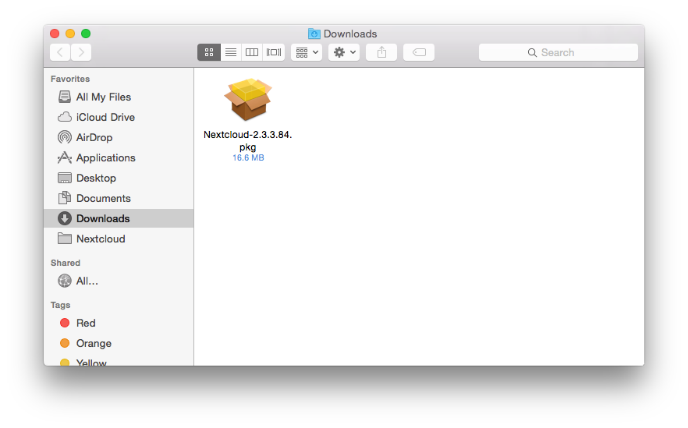
The MacOS Package will download, click on it to launch once it has downloaded.
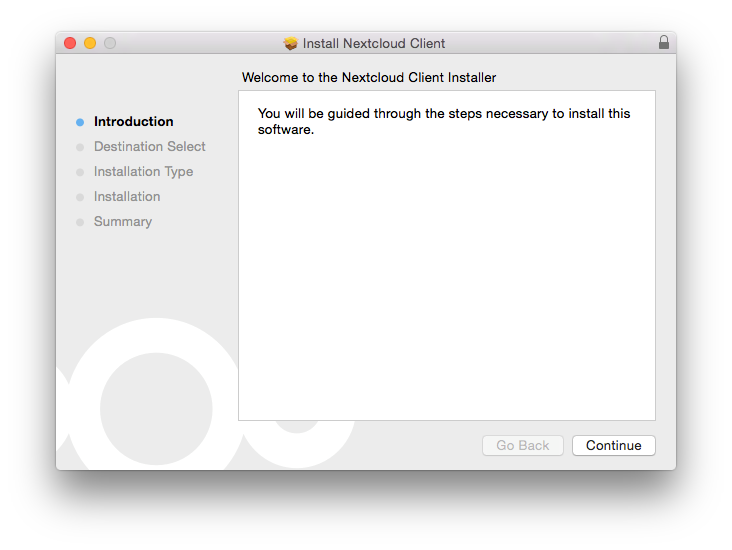
Click Continue when prompted.
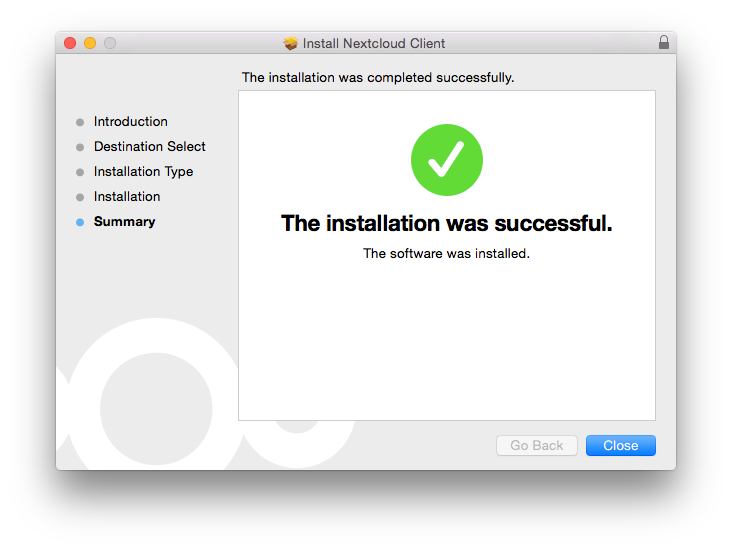
Click Close
When the NextCloud client runs for the first time, you will be presented with the following screen. Click on Log in to your Nextcloud.
it will ask you for a server address. Type in https://rds.unisa.edu.au as below. Click Next >.
The NextCloud desktop client will now try to connect to your UniSA NextCloud account. Click on Log in.
Follow the on-screen instructions to log in to UniSA Research Data Storage (or see How do I log in to the Webpage for more details).
Once you have logged in, the NextCloud Desktop Client will ask you to grant it access to your NextCloud account. Click on Grant access.
The final step is to configure what files will be synchronised to your computer. If you are happy with the default settings, click Connect ....
The NextCloud Desktop Client is now set up.
You can view the local copy of your files in your Nextcloud folder.
You can copy files to and from this folder and they will be synchronised up to UniSA's onsite storage. You will also see changes that other users make to these files if they have been shared.
Please click here to return to the top of the page.
Have your industry partner navigate to https://rds.unisa.edu.au
If your industry partner is associated with Australian Access Federation they can simply click Login to UniSA Research Data Storage and fill in the relevant details.
If they are not associated with AAF and wish to use a social login of their choice they can choose one of the options that we present, currently Google.
Some external partners may not wish to use social login.
If they do not wish to use a social login then we have a method of sending them a link and a password that is detailed in the How to Share Files FAQ.
Registering an account with UniSA Research Data Storage is preferable for longer term sharing arrangements and allows the partner to use the tools available like Desktop or Mobile Clients.
Short term sharing can be shared via the more casual method of emailing a link and a password but is limited in it's flexibility.
For this demonstration we are going to use Google.
Click on the Google icon.
If they are not already logged into Google they will be prompted for their username and password.
Once their credentials are entered they will be logged into your Partner NextCloud Profile.

Please note that in the lower left hand area you will see that by default Partner logins have ZERO space assigned to them. This is by design. Space is assigned indirectly by internal staff sharing folders with them. Access and permissions within those shared folders are controlled by the sharer.
For them to see or upload data you will need to create and share a folder with them.
Please see How to Share Files FAQ for more information on how to share files.
Please click here to return to the top of the page.
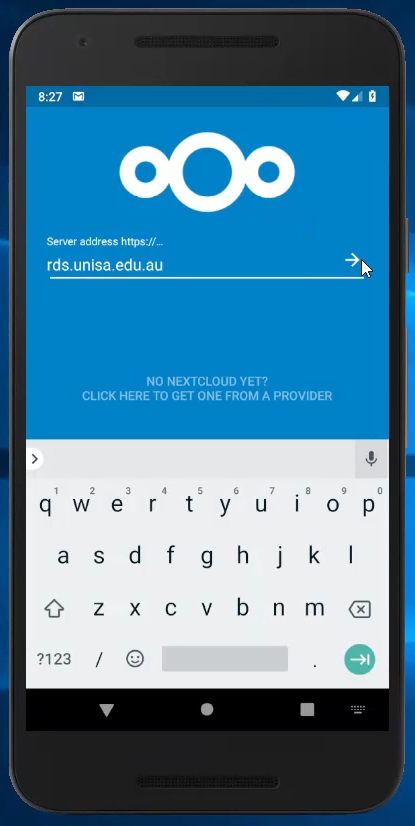
Start your Android phone and go to the Google Play Store.
In the Search Field, type Nextcloud and press enter.
When found, click Install.

Once finished installing, click Open.
Move through the information screens or click Next.
When prompted for server address type
rds.unisa.edu.au
click the arrow next to it.
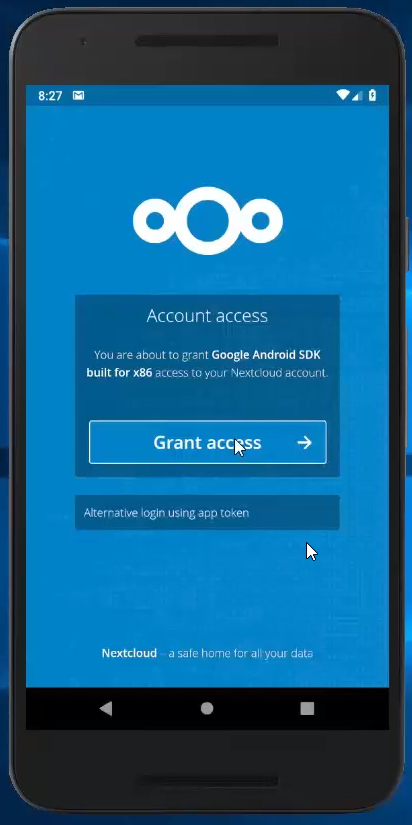
When prompted click Grant Access.
Click on Login to UniSA Research Data Storage as indicated below.
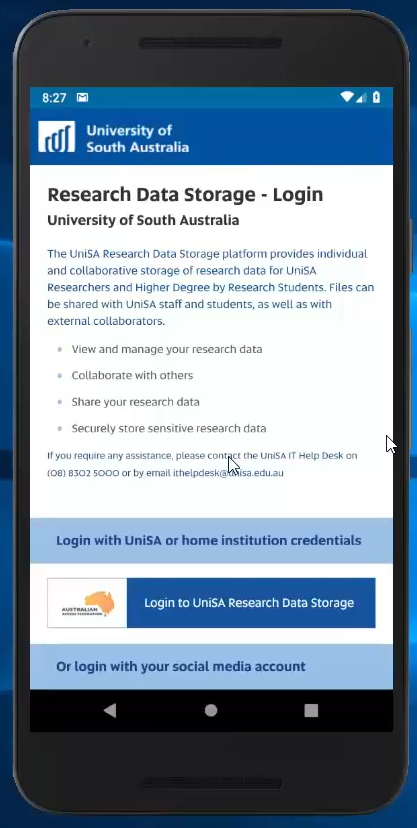
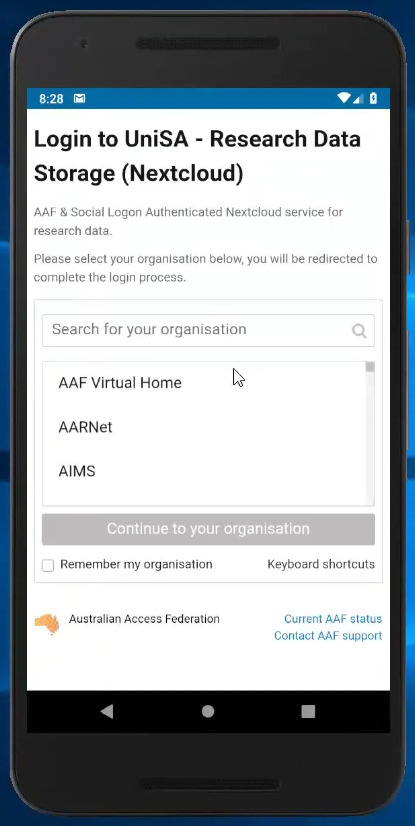
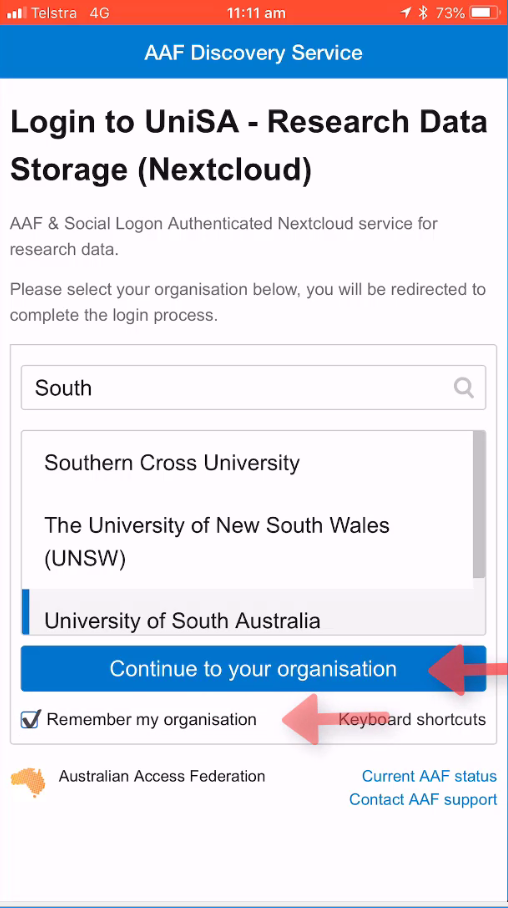
At the next screen you may be asked to specify which University you belong to
1. In the search bar type South
2. University of South Australia will be shortlisted, please select it.
3. Tick Remember this selection permanently
4. Click Continue to your organisation
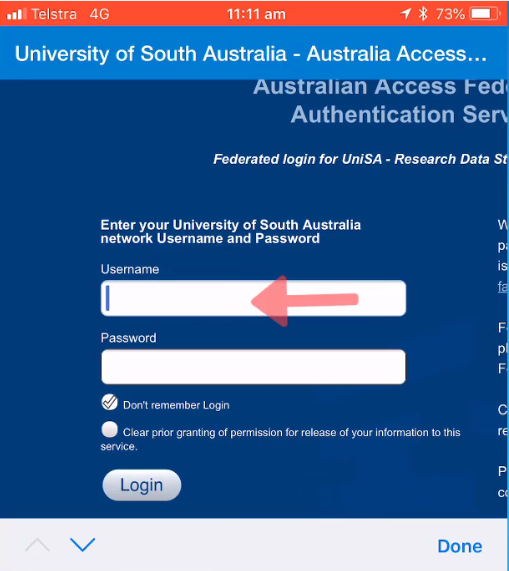
When prompted at the next screen
1. Enter your username
2. Type your password
3. Click don't remember login (if you are logging in from a public computer)
4. Click Login

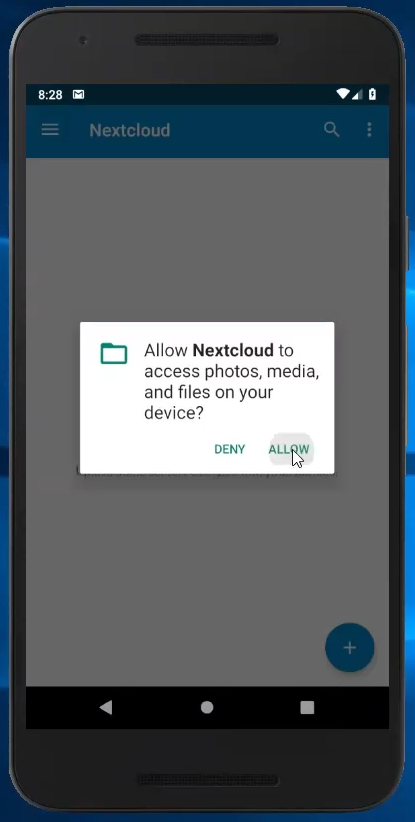
When asked if you want to allow NextCloud to access photos, media etc, click Allow.
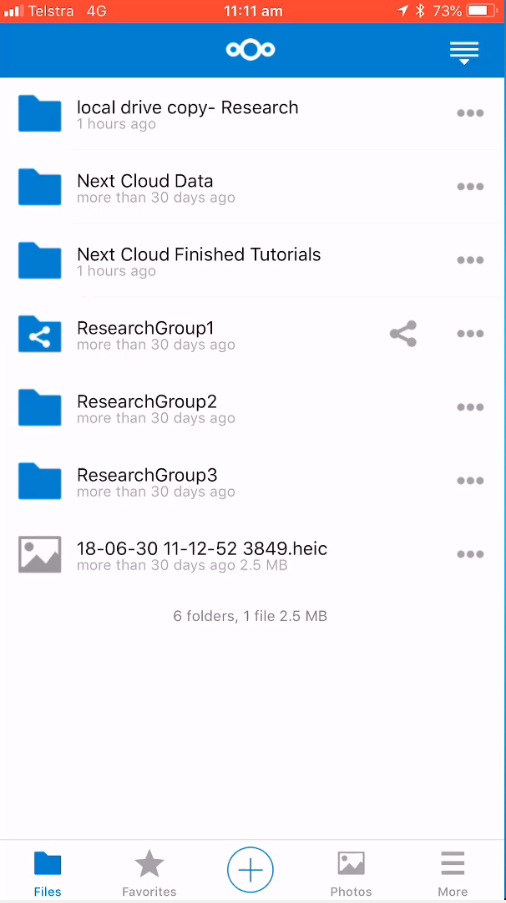
You will see a reflection of the files that are stored in your NextCloud profile on your Mobile.
You can download these files individually to work on them.
You can also share these files with Registered NextCloud Partners.
Files that you upload from here will be copied to all other NextCloud devices, like your workstation if you have that setup.
Vice-versa, files that you create or upload on your workstation will be available to download on your mobile device.
Please click here to return to the top of the page.
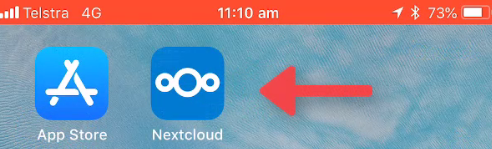
Start your iOS device and go to the App Store.
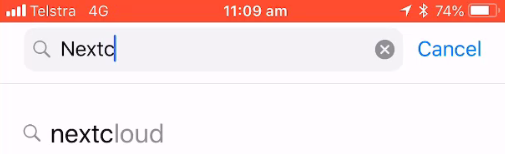
In the Search Field, type Nextcloud and press enter.
When found, click Install.
Once finished installing, click to open it.
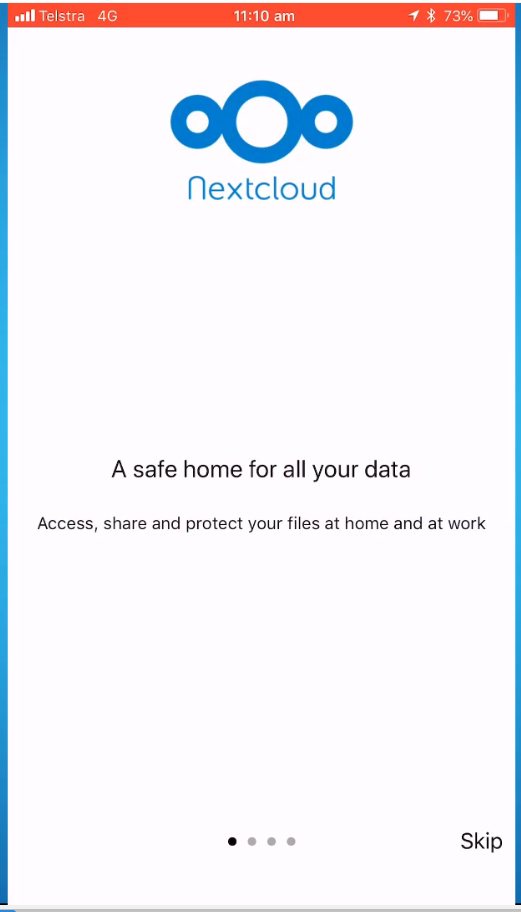
Move through the information screens or click Next.
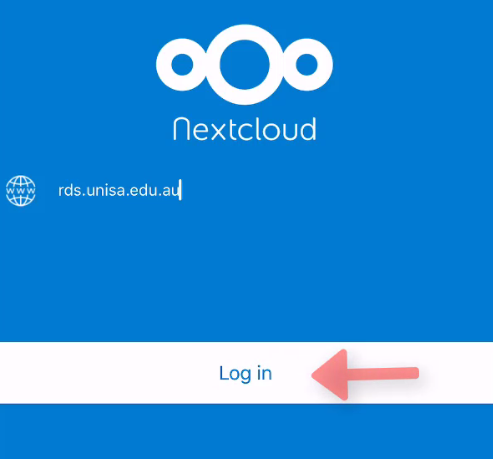
When prompted for server address type
rds.unisa.edu.au
click Log in
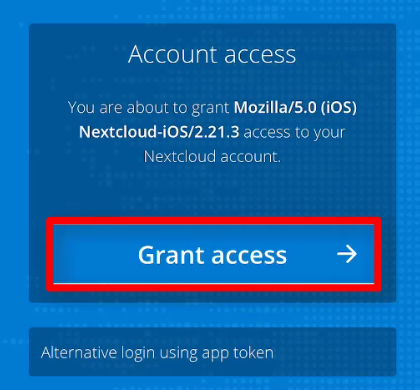
When prompted click Grant Access.
Click on Login to UniSA Research Data Storage as indicated below.
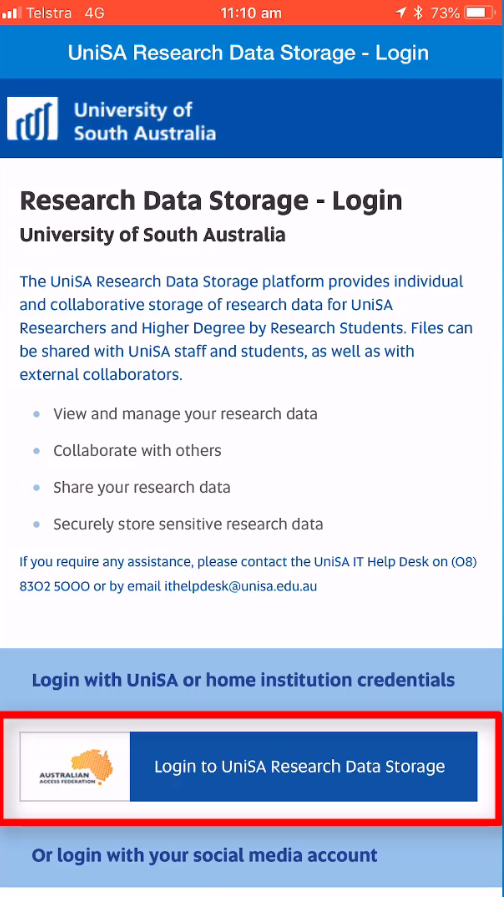
Note: The next few screens, may or may not be presented, depending on whether you have previously logged in using AAF. I have included screenshots and guidance for a fresh installation, so please use them as a guide.
At the next screen you may be asked to specify which University you belong to
1. In the search bar type South
2. University of South Australia will be shortlisted, please select it.
3. Tick Remember this selection permanently
4. Click Continue to your organisation
When prompted at the next screen
1. Enter your username
2. Type your password
3. Click don't remember login (if you are logging in from a public computer)
4. Click Login
You will see a reflection of the files that are stored in your NextCloud profile on your device.
You can download these files individually to work on them.
Files that you upload from here will be copied to all other NextCloud devices, like your workstation if you have that setup. Vice-versa, files that you create or upload on your workstation will be available to download on your mobile device.
Please click here to return to the top of the page.
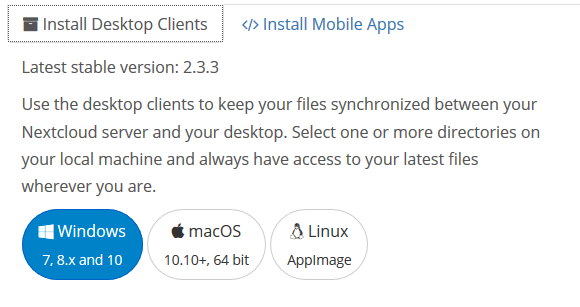
If you want to install NextCloud on a personal device please access the NextCloud installers by clicking your profile badge (top right hand corner), then click Settings.
On the left select Sync Clients and then click on Desktop App.

You will be redirected to the NextCloud website where you can download the latest version of the installer for your device.
Please click here to return to the top of the page.
Sometimes you will upload a file to Research Data Storage and will not want to keep it on your workstation due to its size.
The desktop client allows you to select and or you could move uploaded files into pre-existing un-synchronised folders.
Open your desktop NextCloud client by double clicking on the green tick ![]()
To exclude them from being synched, do the following:
Un-tick the folder and click Apply and the folder will be removed from the workstation.
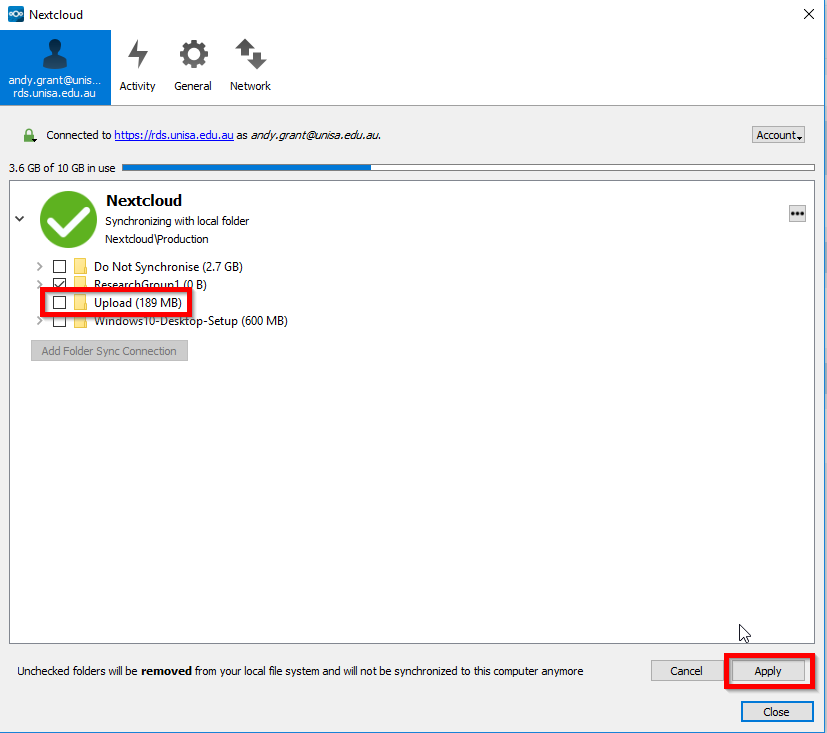
Note: The Do Not Synchronise is holding 2.6GB of data.
Please click here to return to the top of the page.
Please click here to return to the top of the page.
Please see the UniSA Research Data Storage Features page for step-by-step guides on using common features such as file sharing.
If you require further information or assistance please contact the IT Help Desk.