Participants method of joining a Zoom meeting differs between course work virtual classroom session(s) and staff work meetings, but regardless of how hosts/participants join, once in a Zoom session the available features are identical. Which is why some of the below options will take you to a learnOnline help resource.
Zoom is a cloud application providing video conference services using infrastructure hosted outside of the University. Problems with this service, such as dropouts or connection failures, will be a result of failures with this external infrastructure and not the University’s hardware or network.
The below pages are to assist with Zoom meetings/sessions being conducted outside of university courses.
If you will be using Zoom for a course you are undertaking please refer to either Staff Zoom Assistance or Student Zoom Assistance.
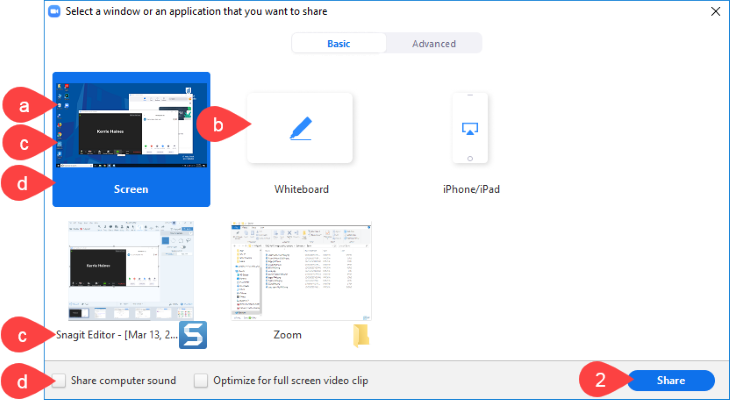
There are a number of options for hosts to share with participants, the most popular/common are:

Scheduling privilege is designed for a user or an executive admin to:
Steps on how to do this are available through the Zoom scheduling privileges page.
Please refer to Add a Co-Host page.
Did you know that you can delegate other people as alternative hosts in Zoom meetings?
If you have created a Zoom meeting but would like to add others to be capable of hosting the meeting in your absence (or automatically become co-hosts when you are there), then you can do this by adding them as “Alternative Hosts”.
This is especially important if, for instance, they need to record your meeting on your behalf.
To set up an Alternative Host, when scheduling a Zoom meeting follow these steps:
For more information on alternative hosts please click here.
Please refer to the Managing Participants page.
Please refer to the Breakout Rooms page.
Please refer to the Audio in Zoom page.
Please refer to the Accessing Zoom Recordings page.
Please refer to the Upload Zoom Content page.
The following settings will be default on UniSA Zoom conferences in order to improve security :
More information on Zoom Security can be found here.