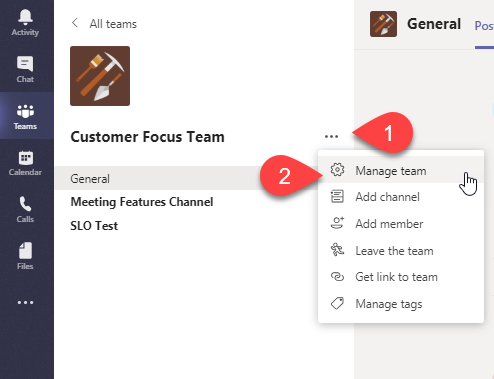
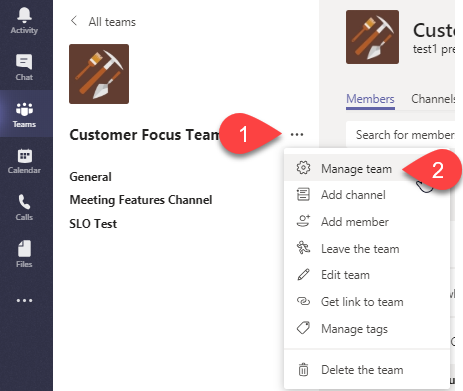
Team Owners can manage the structure of the Team as well as the roles of Team members and Guests.
Channels are dedicated sections to focus conversation and collaboration on a particular focus area, topic, project, initiative or location. A Team can have multiple channels to help organise your conversations and files. Channels can be created and removed by Team Owners.
Discuss names with your Team BEFORE creating a new Channel, as changing a Channel name can cause issues with OneNote Tabs/Notebooks and Document Library folder names not updating.
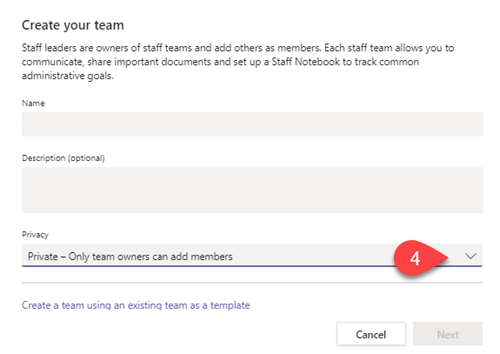
A naming convention will be applied to your Team name automatically.
The Teams name should comply with existing ICT Policies and Acceptable use of Information Technology (IT) facilities
Names should contain no more than 50 characters.
Teams can be used as a chat and meeting tool only without the need for creating a Team.
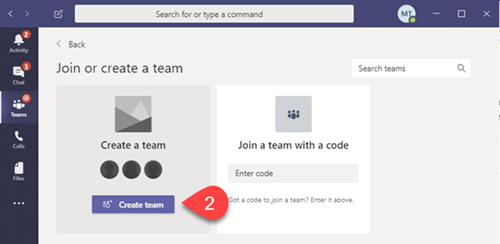
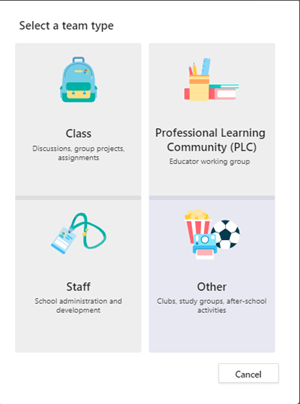
If you decide to create a Team consider the following:
Note:
Microsoft Teams must be used for University related activity and not for personal use.
The Team Owners will be responsible for monitoring content posted within Teams. UniSA reserves the right to remove any Team that does not adhere to the approved University policies as stated in the IT Policies and Guidelines
If you decide to create a Team consider the following:
Follow these instructions (Microsoft support) to change an existing team from Public to Private
Make a public team private in Microsoft Teams - Microsoft Support
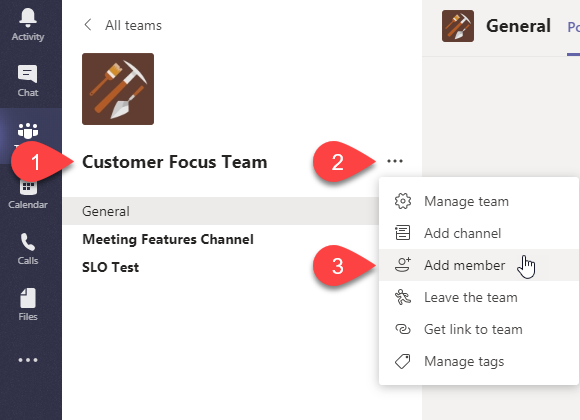
Only Team Owners are able to add new Team members, adding a member to a Team allows them to access to all Channels and files within that Team, there are no private Channels.
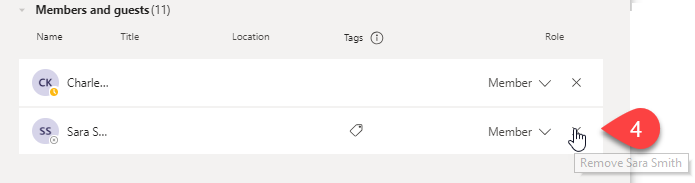
Only Team Owners can remove a Team member.
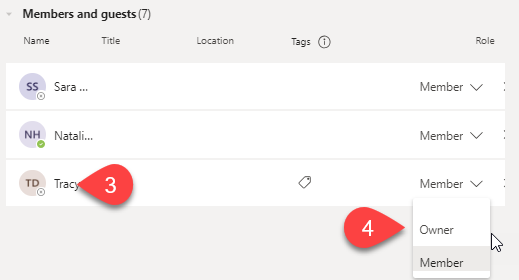
A team owner can change team roles, promoting members to owners as required

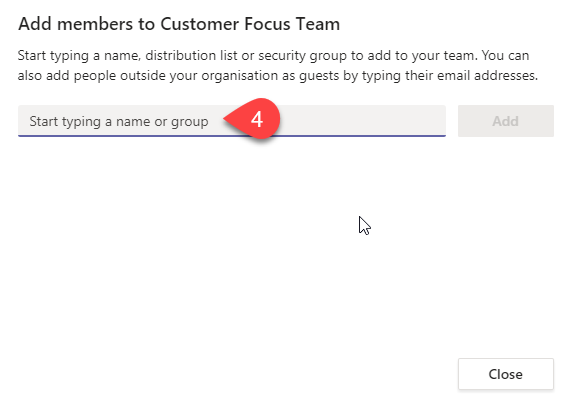
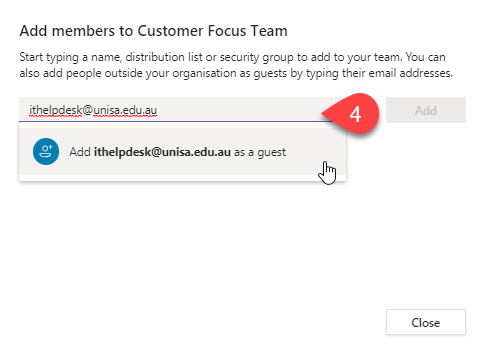
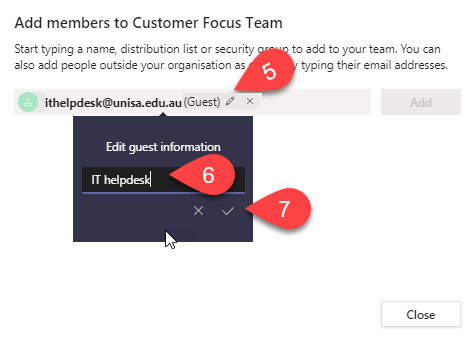
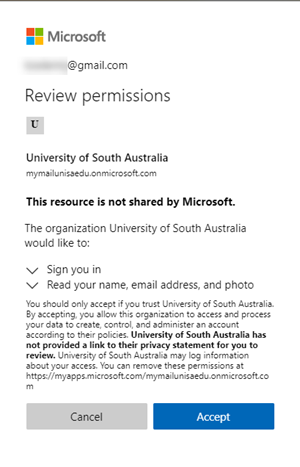
Team Owners can add people outside UniSA (external users) as Guests. Use the same method as adding Team members, though adding a guest requires typing an email addresses (rather than an individual’s name.)
Note: Guest users must accept invitations using the same account that the invitations were sent to.

Guests have the following access to resources:
|
Teams feature |
External Guests |
|
Create a channel (team owners control this ability via settings) |
Yes |
|
Join in private chats |
Yes |
|
Join in public (channel) conversations |
Yes |
|
Post, delete, and edit messages |
Yes |
|
Upload file to document library |
Yes |
|
Share a file (in SharePoint) |
Yes |
|
Share a file in a personal or public chat |
Yes |
|
Create a new team |
No |
|
Add apps (bots, tabs, or connectors) |
No |
|
View organization chart |
No |
|
Schedule meetings |
No |
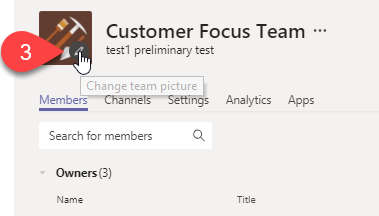
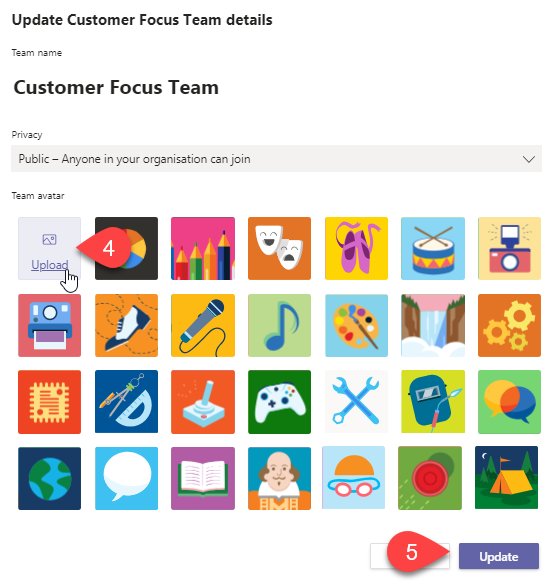
Team owners can upload an image or logo for their Team.
To add or alter a Team logo:
Shared channels are very specific collaboration spaces where you can invite users from your org (UniSA) who are not part of your team and give them access only to this channel. Adding external users (non-UniSA) to a Shared channel is restricted and needs to go through a business and cyber security approval process therefore, in most cases, a Standard channel would be used for external collaboration.
NOTE: Only the users on the team who are owners or members of the private channel can access the channel. Anyone, including guests, can be added as a member of a private channel if they are already members of the team. Each private channel has its own SharePoint site collection so they should be used sparingly.
A 'Standard channel' is default channel type to use for all collaboration activities in Teams with internal or external partners when invited to the team as guests.
Click more options … next to the name of the Channel.
Editing a channel name is NOT advisable, as changing a channel name can cause issues with OneNote Tabs/Notebooks and Document Library folder names not updating.
When a channel is removed, all files and folders in OneNote and the Document Library remain intact, only the channel itself, along with any conversations are deleted. Once removed, the Channel name is ‘locked-out’ and is unable to be reused.
If the channel has been accidentally removed, it can be restored by the Team Owner.
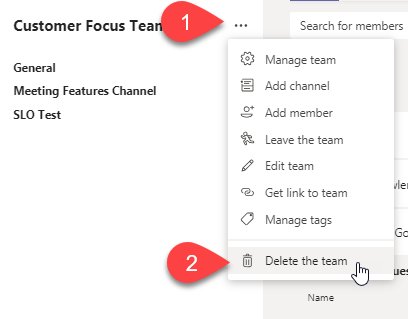
Team Owners can delete a particular team they are responsible for. Doing so will also:
IT admins can restore deleted teams for up to 30 days.
To delete a team:
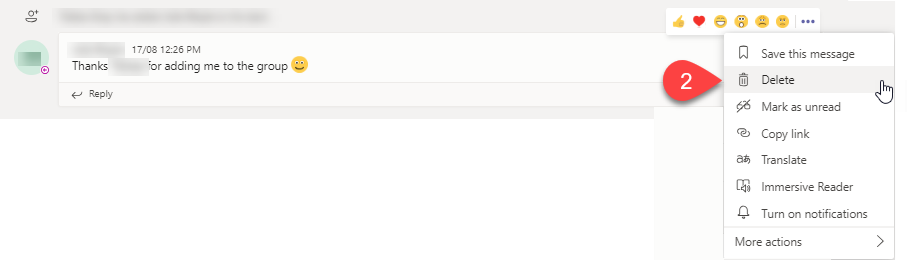
Team Owners are able to delete Chat messages. To delete a message: