Sharepoint permissions are managed through groups that are added to site contents to allow or restrict access. Permissions on a site can be simple or complex depending on requirements and can be managed by site owners within the Sharepoint environment.
To see what access is granted, and to who, you need to view your site permissions. This gives you a view of the access given at the top level of your site. By default, the site content such as Libraries, folders, lists and documents inherit permissions from top level of the site.
If inheritance is broken the permissions created are unique – this may be done to restrict access to a Library, List or Folder. If Unique permissions are applied these can be viewed at the Library or List settings.
You can also get to this screen by clicking on ‘Site settings’ -> ‘site permissions’ from the Cog or Settings menu.
For step by step instructions (including screenshots) see How do I view site permissions?
If you wish to check to see if a particular user or group have access to a Library, Folder or File you can browse to the object you wish to check and then go to the permissions page for that object.
To check for access on a:
This will take you to the Permissions properties for the object.
The banner at the top of the Permissions window will display if the object is inherting permissions from it's parent. If this is the case you can click on 'Manage Parent' and view the permissions from the parent object.
To check the permissions of a user or group click on 'Check permissions' and enter the User or Group name and then 'check now'
You can also do the same check at Site level to see what access a user has.
Your site may contain libraries or content that you wish to restrict access to or apply unique permissions. To do this you firstly need to create a group to manage this access. It should be named in a useful manner that indicates the purpose of the group.
<LibraryName>_<PermissionLevel>
Another example might be a role-based group where Role may be ‘OfficeAdmin’ and the group may be used to grant access to a number of libraries or content.
<Role>_<PermissionLevel>
For step-by-step instructions (including screenshots) see How do I create a group?
For step by step instructions (including screenshots) see Applying Unique Permissions.
You can view the unique permissions on a file by following these steps:
For step by step instructions (including screen shots) see How do I check if a file/folder in SharePoint has unique permissions?
You can remove the unique permissions on a file/folder by following these steps:
For step by step instructions (including screen shots) see How do I remove unique permissions on a file/folder?
To add a user to an existing group:
For step-by-step instructions (including screenshots) see How do I add a user to a group?
You can control the ability of users to share files and folders or site content by changing the Access Request Settings.
To enable or disable sharing by team members with non-members
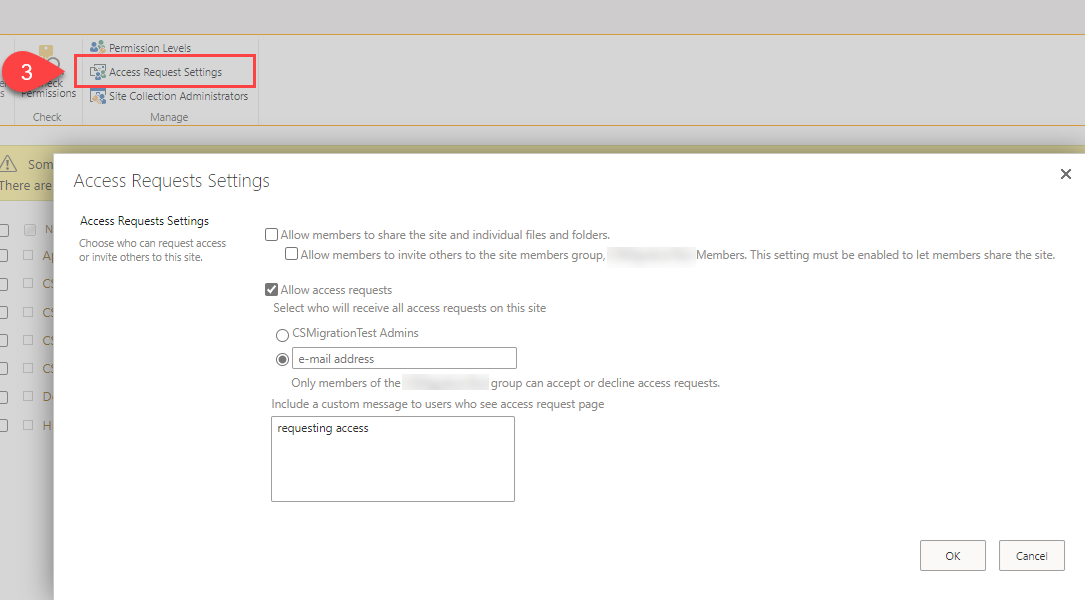
Link to the page How can I restrict site sharing or sharing of folders and files?
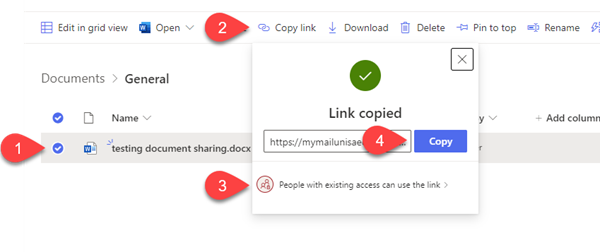
You can share a link to a file or folder several different ways. The important point is to always select 'People with existing access' as this leaves the permissions on the folder or library unchanged.
To copy a link to paste into a meeting request or include in an email message or Teams chat
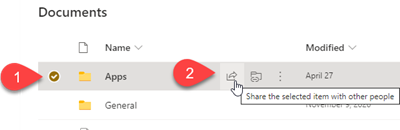
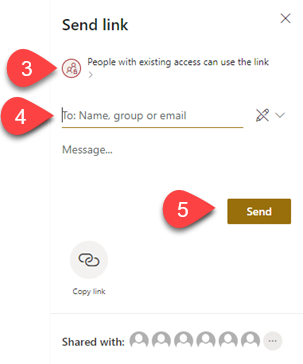
To send a link directly via email
SharePoint sites are set to restrict external access by default. If you wish to allow external access to your SharePoint site then submit a request to Helpdesk with the details of the site and the full email address and names of users who require access.
It may be recommended that a new site be created for the purpose of sharing with External users rather than allowing external access to the existing site. This approach maintains a higher level of security for both sites.
Once external sharing has been enabled the user can be added to a group using their email address.
The external user is added in the same way as another user but you enter the entire email address. There will be a warning that this user is outside of your organisation.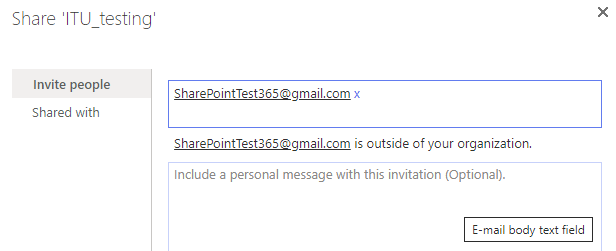
You can choose to allow SharePoint to send an email invitation to the user but it is a good idea to send an email from your own account as the auto generated emails are sometimes caught by the spam or disregarded by the user.
The user needs to accept the invitation and the license conditions using the same email address used in the invitation.
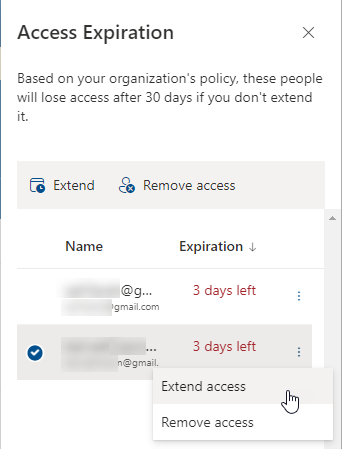
External guest access will automatically expire after 30 days.
If you wish to have external access set for a longer period then a request can be made via the ITHelpdesk.
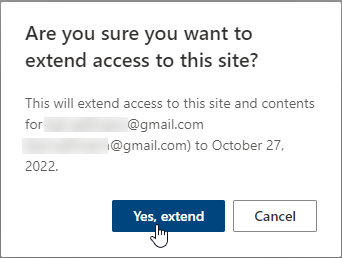
To extend or remove the external access click on the Manage link.