How to Print with different paper types
Follow this Guide on how to use different paper types with Follow-You-Print-Q printers.
- To use different paper types the Tray 5 (Bypass) need to be selected
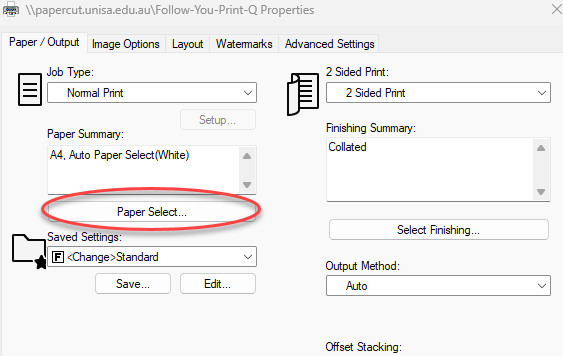
- From your application goto File -> Print and select Printer Properties
- Click Paper Select

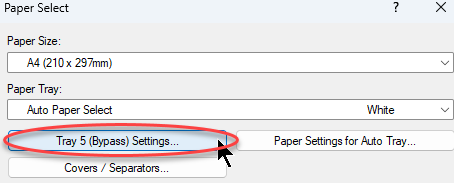
- Click Tray 5 (Bypass) Setting

- Press YES on the popup warning about changing to Paper Tray 5 (Bypass)
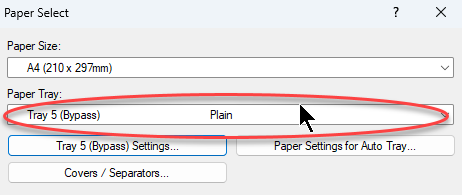
- Press OK to Set Tray 5 (Bypass) as Plain Paper/Portrait

- Press OK again to get back to the main Printer Properties page
- Check for any other printer properties that could impact the print job, such as Color or 2 Sided Print for example.
- Send the job to the printer
- Goto the printer, locate the bypass tray and insert the required special paper type (be sure of the tray orientation if using A4 paper)
- Tap your ID card and Release the required print job
Further Assistance
If you require further information or assistance, please contact the IT Help Desk on (08) 830 25000 or 1300 558 654.


