How do I add an Office Printer(s) on a Windows machine?
NOTE: This process should be used to add a named office printer, where Follow-You-Q is not available.
- Type desired print server in Windows search:
- Mawson Lakes/Whyalla/Mount Gambier
\\mlprint.unisa.edu.au
- City West/Light Square/101 Currie Street
\\cwprint.unisa.edu.au
- City East
\\ceprint.unisa.edu.au
- Magill
\\mgprint.unisa.edu.au
- Hit Enter key
 NOTE: If you are adding an office printer on a personal device, when prompted for user name and password ensure you enter username in the format - uninet\<UniSA username>.
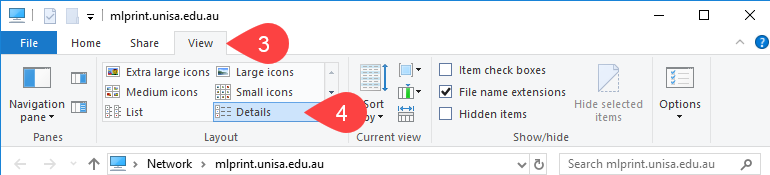
- Click View tab
- Select Details Layout
NOTE: File Explorer will default to an icon view, which can make it difficult to locate desired printers.
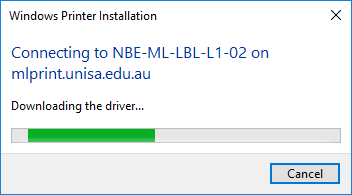
- Double-click required printer(s) from list to install it
-
NOTE: All new printers installed across the University will use a common naming conventions in the format: <CAMPUS>-<BUILDING>-<LEVEL>-<ROOM>-<PRINTER TYPE>. Printer naming convention for all other UniSA Staff <ORG2>-<CAMPUS>-<TYPE>-<BUILDING><LEVEL>-<ROOM>
- Windows will show an Installation progress bar
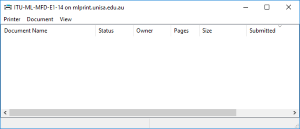
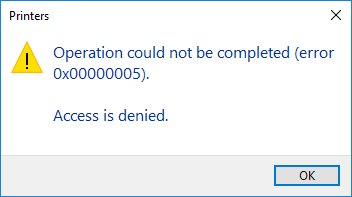
- Windows will then either show:
- Printer Print Queue, if successfully installed; OR
NOTE: You can now start using the printer.
- Access is denied window
NOTE: You do not have the correct permissions to use this printer and will need to contact the IT Help Desk if this is in error.
If you wish to make your recently installed printer the default, please see the change default printer page.
Further Assistance
If you require further information or assistance, please contact the IT Help Desk on (08) 830 25000 or 1300 558 654.